
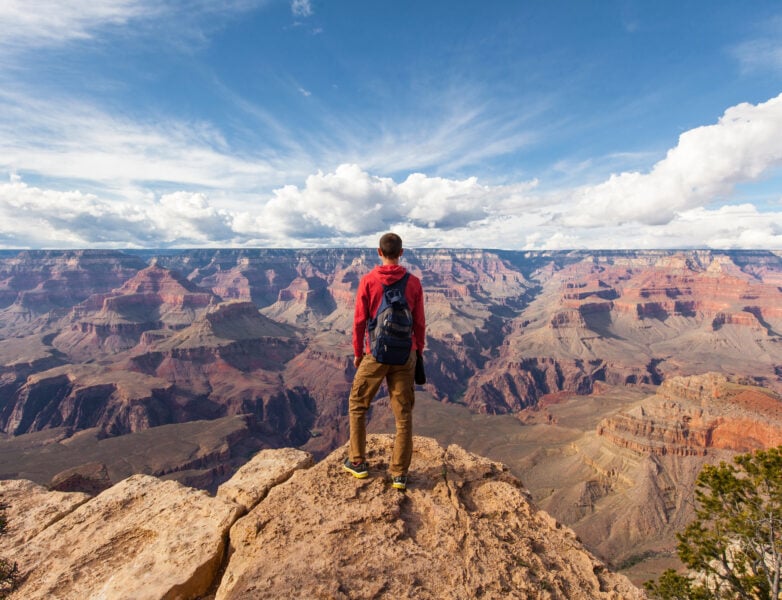
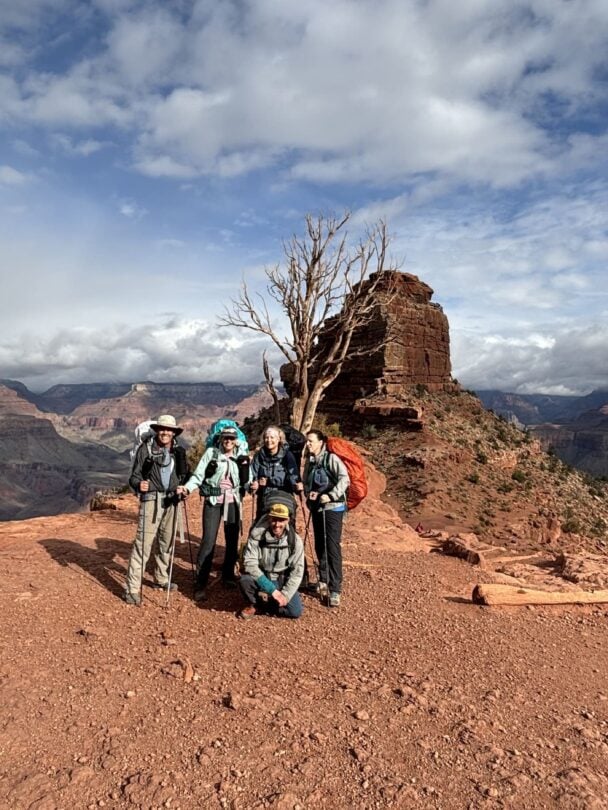
You haven’t seen the Grand Canyon until you’ve seen it on foot. As a professional hiker who’s walked must-see destinations around the world, I can verify that the Grand Canyon is worthy of its title as “one of the Seven Natural Wonders” and it is definitely one of the best hiking destinations in the US.
The trick most people miss on their guided Grand Canyon hikes is that the best views aren’t from the top. The Grand Canyon is so big, that you need to hike into it to get the real scope of its size and beauty.

Hiking in the Grand Canyon
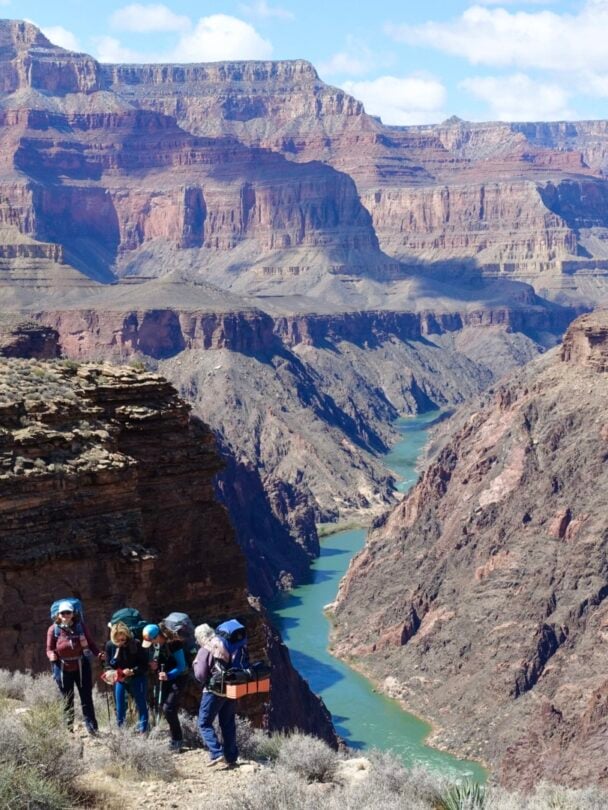
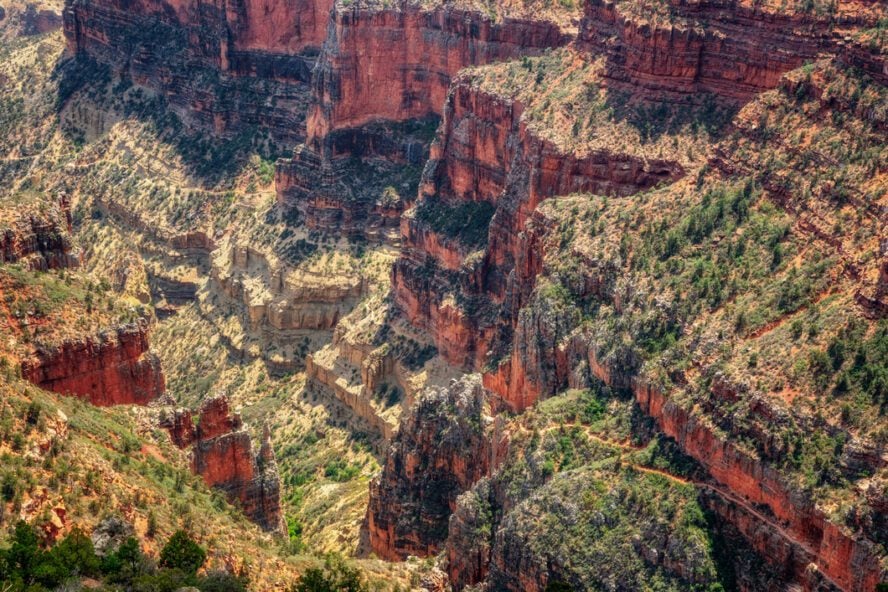
At 18 miles long and more than 6,000 feet deep, the Grand Canyon exhibits 2 billion years of geology along the Colorado River. When you hike down into the canyon, you get to see those red, rust, rose, white, and burnt orange rock sequences up close. Arizona’s dry air preserves these colorful rocks well. You’ll see layer upon layer of what geologists consider some of the most complete geologic columns in the world.
You can access the Grand Canyon from either the North or South Rim. The Colorado River bisects the Kaibab Plateau, which means both sides have trails that are relatively flat on the rims. Trails that drop into the canyon are much steeper.

At an average elevation of 8,000 feet, the North Rim is about 1,000 feet higher in elevation than the South Rim. Because of the diversity in elevation throughout the park, it’s home to five of the seven life zones in the world and three of the four types of deserts in North America. When you hike in the canyon, you get to see a lot of ecosystems in relatively few miles of walking, with flora and fauna diversity.
Be prepared for varying temperatures and conditions
If you’ve ever been hiking in Arizona, you’ll know to expect heat. Temperatures in the canyon vary by elevation and season. The bottom of the canyon along the Colorado River can be 30° warmer than on the Rim. In summer, the Inner Canyon gets above 100 ºF on most days. I always start hikes into the canyon at sunrise or pre-dawn, bringing electrolytes and more water than I think I need (the park recommends carrying at least a gallon per person per hike).
Like hiking in Austin or any other place that sees over 300 sunny days a year, sun protection — including sunglasses, a sun hat, and sunblock — is essential. Snow and ice are common in the winter and early spring. If you’re visiting at that time of year, check first with rangers to make sure your trails are safe for travel. The Grand Canyon claims lives every year and rescues are common. Be prepared and check weather and conditions before setting out on any of these hikes at any time of year.

Do you need a guide to hike in the Grand Canyon?
Hiking with a guide in the Grand Canyon is a great idea if you want to pack as much sightseeing into your trip as possible. A guide can take all of the guesswork out of planning your trip, can customize a hike to suit the skill level and objectives of your group, and can show you the best that the Grand Canyon has to offer. If you choose to hike on your own, make sure you plan ahead to avoid the crowds and heat.
How fit do you need to be to hike in the Grand Canyon?
Depends on the trail you choose. Some hikes, like the Trail of Time, are forgiving walks on flat terrain with little-to-no altitude change. Others, like the North Kaibab Trail to Roaring Springs, include significant altitude gain, challenging terrain, steep drop-offs, and even some high-risk scrambling, Research the trail map in advance and choose one that’s appropriate for your skill and fitness level.
Some additional Grand Canyon hiking tips
A hat, sunscreen, and adequate water aren’t only a necessity in the summertime. The sun is a killer even in the shoulder seasons, especially on the more exposed sections of the rim, so don’t take it lightly.
Book your hike fast. Many trails in the Canyon are subject to an extremely competitive ticket lottery system. Scoring a spot for the popular multi-day treks such as the Grand Canyon rim-to-rim hike is tough if you don’t do it well in advance.
Plan your stay ahead of time
Whether you’re visiting the North or South Rim, I recommend making reservations for hotels and campgrounds months before your trip. If you are visiting during a popular time or making a last-minute decision to visit, there are hotels available outside the park.
I often stay (or at least eat) in the town of Tusayan, which is about 2 miles south of the South Rim entrance station. Kaibab, Arizona, and Kanab, Utah, are the closest towns to the North Rim, both about a 1.5-hour drive from the North Rim entrance station.
What’s the best time to visit the Grand Canyon?
When planning your Grand Canyon tours, you’ll need to consider a lot of different factors — mostly how fond you are of the crowds!
- Spring – best for optimal temperatures and avoiding the crowds
- Summer – best for sightseeing and off-the-trail activities
- Fall – best for beautiful foliage
- Winter – best for solo adventures
Grand Canyon in the Spring
Spring is the best time to visit the Grand Canyon thanks to the blooming wildflowers, pleasant weather, and sparse crowds. As the temperatures slowly rise, you’ll likely work up a sweat along your hike, but you won’t be at risk of heatstroke like in the summer months. Also, planning your hike for before June means beating the high-season hordes. It’s also the safest time to hike in the Grand Canyon, as long as you pay attention to the potential snowfall of the North Rim.
Grand Canyon in the Summer
Summer is peak season in the Grand Canyon. The days are long and sunny, the temperatures stay in the 80s, and all the tourist services are open. However, it’s also the park’s busiest time of year — the trails are crowded and accommodation options are limited. Also, as anyone who’s ever been rock climbing in Arizona would tell you, the exposure is crazy, so be wary of sunburn and dehydration.
Grand Canyon in the Fall
Fall is my second-favorite season in the Canyon. The temperatures are cooler than in the summertime, the crowds are thinner, and the park’s foliage takes on some beautiful hues. If you find yourself in the Grand Canyon between September and November, a day trip to Falstaff or some hiking in Red Rock, Sedona is a must. However, the weather is more unpredictable in the springtime, so be ready to layer up.
Grand Canyon in the Winter
Wintertime hiking in the Grand Canyon is about as crowd-free as the Bryce Canyon hikes. While it’s easier to get a good deal on a hotel room and a snow-capped Canyon is quite a sight, the North Rim is closed during the winter months, so you’ll be limited to the southern sections of the park. Also, the temperatures regularly dip down to the low 40s in the day. Only recommended if you don’t mind delays, sudden itinerary changes, and winter weather, but make sure to pack accordingly.
Best Hikes In Grand Canyon’s South Rim
As the most popular section of the Park, the South Rim gives you excellent shuttle coverage, a good restaurant offer, and a wide range of accommodation options. However, it gets very crowded, especially in the high season, so you should plan your trip accordingly.
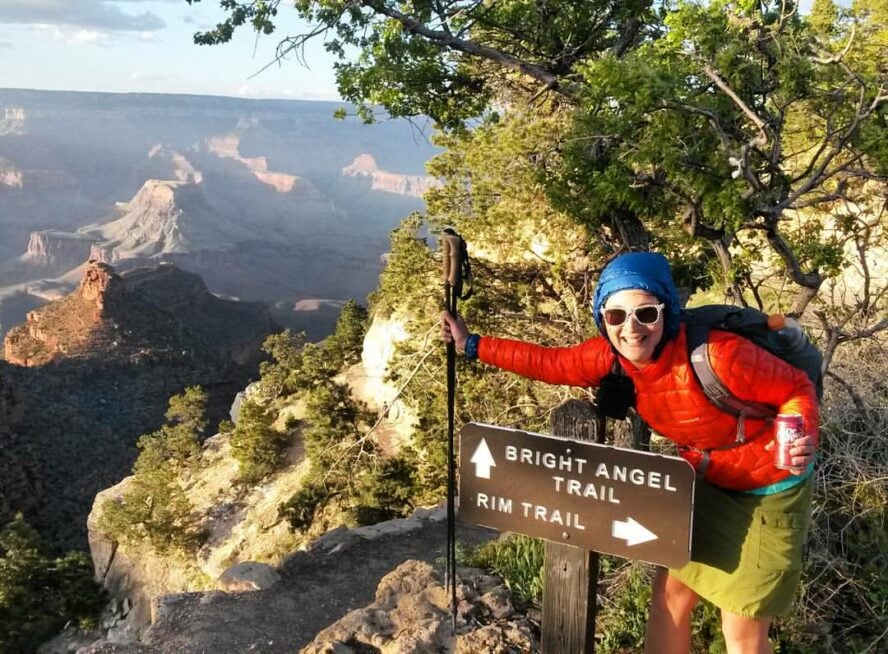
1. Bright Angel Trailhead to Indian Garden Campground
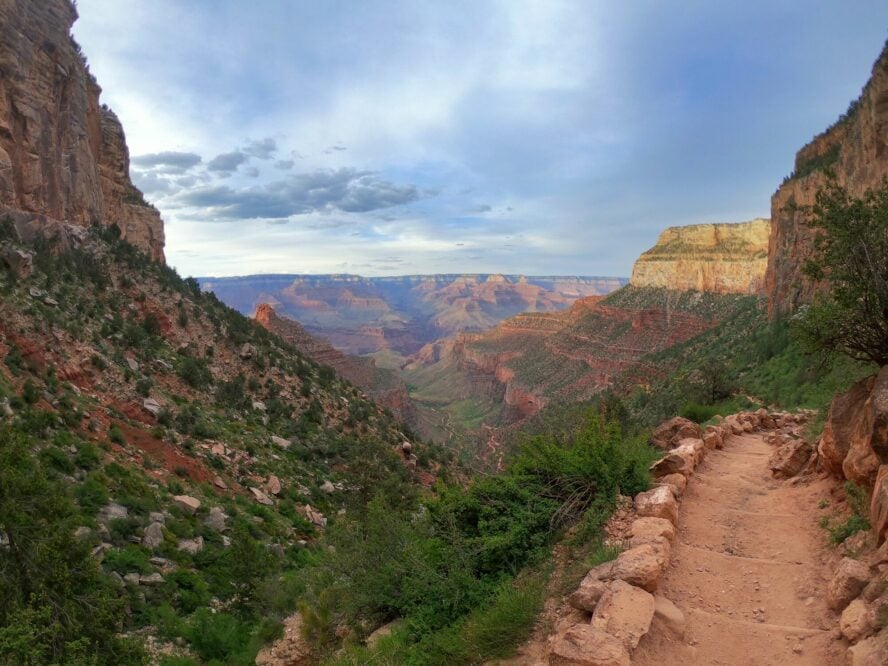
Considered the premiere hike in the Grand Canyon, the Bright Angel Trail to Indian Garden is one of the most popular in the park. This 8.8 mile, 2,080 feet elevation gain out-and-back takes you past 2 billion years of geology and rock towers made of layers of red, rust, rose, and white.
The hike ends at a startlingly lush oasis of cottonwoods, willows, and grasses along a perennial stream. It’s a stark contrast to the grand towers of red desert rock you’ll see for your journey two-thirds of the way to the Colorado River.
A good option for an overnighter
While the descent is the easy part, the climb to get back to the trailhead is what most hikers find difficult. Before you go, check with rangers about conditions and (most importantly) whether the drinking fountains along the way are turned on. I recommend staying overnight on the Rim and starting pre-dawn or at sunrise because the ascent at the end is the hard part. You don’t want to be doing it during the hottest part of the day.
Indian Garden can be 20 degrees warmer than the Rim. This hike takes most people longer than they expect (budget twice the time to climb as to descend), so I’d suggest bringing a headlamp or flashlight so you don’t get stranded. Don’t let this scare you off, though— the Bright Angel Trail is considered to be the safest hike in the Grand Canyon.
Yield to oncoming mules
Start at the Bright Angel Trailhead (elevation 6,860 feet/2093 m) and descend down wide, well-maintained, well-marked switchbacks. This is the route used by the mule team that supplies Phantom Ranch at the bottom of the canyon, so they keep it in tip-top shape. Even with the (relatively) gradual descent, I like having trekking poles to help my knees.
Since there’s so much descending, I suggest making sure you have sturdy hiking shoes that are sized up. You won’t want your toes banging against the front of your shoes on this hike. You’ll also want to trim your toenails before this hike as long nails can dig into other toes when you’re descending this much. If you do run into the mule team, yield to them. The trail is plenty wide, except when you’re sharing it with a stock animal.
The first half mile can be full of canyon-gazers who can be slow to get out of the way. I’ve found that starting early, being patient, and asking groups to yield can help you navigate the crowds. As you descend, admire the layers upon layers of rock and the colossal cliffs in view. Even just half a mile in, the expansive panoramas of the canyon and surrounding rock are so much more up-close-and-personal when you walk into the canyon.
Top off your water bottle at Mile-and-A-Half Rest House
After 1.6 miles, you’ll reach the almost fittingly-named Mile-and-A-Half Rest House (5729 feet/1149 m). There’s a drinking fountain, toilet, and shade. Most hikers take a break here to cool off. During the busy season, there’s a ranger stationed here. On hot days (which tends to be most of the time), I’ll top off my water bottles here and soak my hat or shirt before continuing on. If the hike is getting to you, this makes a good turnaround point. You’ll have 1,100 feet of climbing from here back to the Rim.
At 3.1 miles in you reach the Three Mile Rest House (4748 ft/1149 m). Crowds drop off, though you’ll still see many other hikers taking a cool-off here. As at the other rest house, there’s a toilet. During peak season, there’s a running drinking fountain and ranger, too.
Indian Garden Camp
Finally, you’ll reach Indian Garden Camp at 4.4 miles in (3,800 ft/1160 m). If you make a reservation, you can camp here as part of a backpacking trip. Be sure to check the thermometer displayed here. I’m always surprised how much warmer it is at Indian Gardens than on the Rim. There’s a drinking fountain, clean toilets, picnic tables, a ranger station, and shade.
Indian Garden was home to the Havasupai people who lived in the canyon for thousands of years, drawn to the perennial water. They cultivated this site for crops — a literal garden. Archeological evidence near Indian Garden shows that the Ancestral Pueblans and prehistoric Cohonians lived here as early as AD 300.
Nearby are remnants of ten seasonal Pueblan structures. Although Theodore Roosevelt kicked out the Havasupai in 1903, the name remains (in part due to a private tourist resort called ‘Cameron’s Indian Garden Camp’). In 1923, the Park Service took over and began running the camp you see here today.
For the fit and prepared, the Bright Angel Trail to Indian Garden is the quintessential hike in the Grand CanyonFor the fit and prepared, the Bright Angel Trail to Indian Garden is the quintessential hike in the Grand Canyon
by Liz Thomas


Bright Angel Trailhead to Indian Garden Campground - Good to Know
Advanced (day-hike), Intermediate-advanced (as a two-day backpacking trip)
7.8 miles
3,000 feet of climbing
None needed for a day hike. If you want to backpack into Indian Garden, you can get a backcountry permit here
5 to 10 hours. Strong hikers may be able to do it in 3 hours. It takes some hikers 12 hours
April, May
If you stay overnight at the South Rim, it’s easier to start at pre-dawn or sunrise. If the shuttle bus isn’t running at that hour, you can still snag a primo parking spot
Getting there
Most people fly into Phoenix or Las Vegas and rent a car to reach the Grand Canyon ($35 vehicle fee good for one week). Otherwise, take the National Park Service Village Shuttle Bus to Bright Angel Lodge and follow signs to the trailhead. Amtrak provides train access to the South Rim with a stop in Flagstaff and a connector bus into the park.
2. South Kaibab Trail to Cedar Ridge
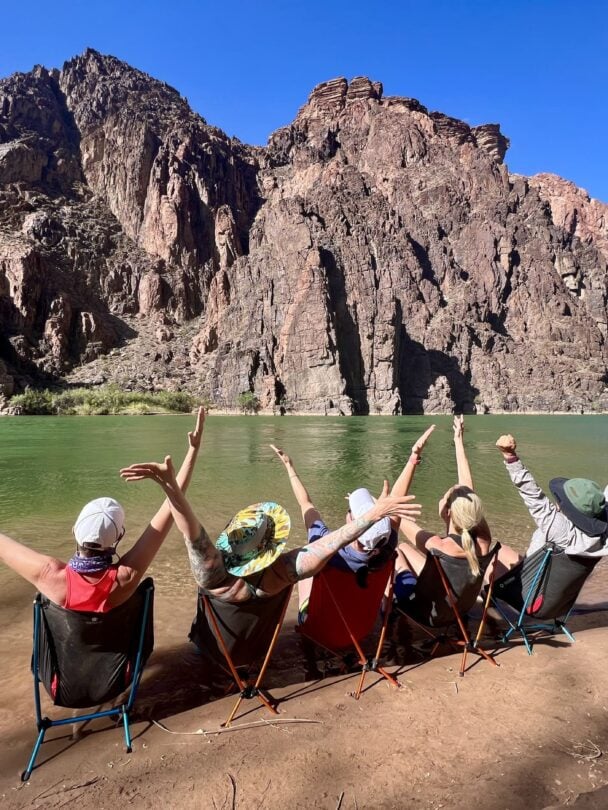
If you want 360º views of the North and South Rim and the fastest way to get to the canyon interior, check out the South Kaibab Trail to Cedar Ridge. This trail turbocharges you through much of the canyon’s geology in less than a mile. Painted layers of towering cliffs loom all around you. One of the finest trails in the park, the South Kaibab Trail is a wide, well-maintained, and signed path that leads from the rim all the way to the Colorado River. I like that it feels wilder than the Bright Angel Trail with fewer crowds.
A relatively short trail with rewarding views
This is a trail I like to start early (there’s even a free 4 am shuttle bus here during the summer). Bring one gallon of water per person and sun protection. Unlike the Bright Angel Trail, there are no drinking fountains here. Be sure to check temperature predictions for the day. Like all Grand Canyon hikes, the difficulty can be deceptive because the hardest climb happens at the end of your hike on the return.
Another warning: the trail is used by mules that resupply Phantom Ranch below. For your safety and that of the animals, yield to them. For the prepared hiker, the South Kaibab Trail can be the best part of your Grand Canyon trip and this is a great option for a guided day hike.

Starting at the South Kaibab Trailhead
The bus drops you off at the South Kaibab Trailhead, which has pit toilets, water, and picnic tables. The trail descends on red rock gravel here, reminiscent of hiking in Colorado. Wooden logs give the effect of “steps” as you descend.
This trail doesn’t mess around: you begin with tight switchbacks down through the youngest exposed rock layer in the park, the grey Kaibab Limestone. If you’re visiting in spring or late fall, check with a ranger for conditions. I’ve been here in late March and still found ice.
After half a mile, the trail levels out. Continue descending for another mile to the fittingly named Ooh-Ah point. Here, you’ll get your first panoramic view from the rim. You can see where the South Kaibab Trail continues below you as it curls around O’Neill Butte to the northwest.
I like how when you look across the North Rim, you can see so many terraces of different colors of rock layers. If you got a late start or are feeling this heat, this is a great turn-around point for a 1.8-mile round-trip (you’ve got about 1000 feet of climbing to get back to the top).

Continue on for the best views
I think the views get better and the crowds get thinner when you continue onto Cedar Ridge. The trail becomes exciting again with steeper switchbacks. If you’re concerned about heights or hiking with someone who is, don’t look to your left at the steep drop-off to Lime Creek. I recommend trekking poles for the descent.
Cedar Ridge is a relatively flat area — which is why it has some of the best 360º views in the park. There are also a few cedar trees for moderate shade, plus a pit toilet. Can you see Brahma and Zoraster Temples? These rounded towers on the North Rim lie just east of where the South Kaibab Trail crosses the Colorado River.

I’ve heard Cedar Ridge referred to as a “humbling spot.” It gives you the kinds of views that make you realize how big the canyon really is, how much more of it there is to see, and how small we are as humans. It’s a place for contemplating the beauty and vastness of the natural world. Speaking of humbling, save plenty of time for the climb back to the rim. Expect it to take twice as long to ascend as it did to get down here.
This was the first hike I did in the Grand Canyon. Although I thought the view from the Rim was pretty, it wasn’t until I started hiking this trail that I understood why the Grand Canyon is a natural wonder.
by Liz Thomas


South Kaibab Trail to Cedar Ridge - Good to Know
Moderate
3 miles out-and-back
1,200 feet on the return
None for dayhiking. Backcountry Information Office required for any camping beyond the Rim. Tips on how to use their permit: backcountry camping permit
4 to 6 hours
Late spring
Take the free Hiker Express Shuttle bus which leaves as early as 4 am in the summer. It’s the quickest way to the trailhead and doesn’t require stopping at every hotel and campground along the way
Getting there
Parking spots here are almost non-existent. Luckily, there are numerous free shuttle buses that run on regular schedules to get you to this trailhead. Even if you were to drive, the shuttle bus is better because it’ll take you right to the trailhead, whereas the parking spots are a quarter mile away. See the free Hiker Express Shuttle bus or Kaibab Rim Shuttle Bus (Orange route) for schedules and pick-up spots.
3. Rim Trail – Trail of Time
The Trail of Time is a relatively new family-friendly hike in Grand Canyon National Park suitable for beginners. Hikers can experience the many layers of the Grand Canyon without having to descend into it. Instead, samples of rocks normally found deep in the canyon have been brought up to the rim and labeled with interpretive signs. These rock examples were excavated from more than 70 geologic layers found in the park and brought to the trail for easy viewing.
Learn about the canyon’s geology on this beginner-friendly hike
Most people like to start at the Yavapai Geology Museum, where they can learn more about what they’re going to see before they start the hike. From there, the flat trail heads west, moving backward through time.
Each meter of the trail represents one million years of geologic history. You’ll first see the youngest rocks in the region, the Kaibab Formation found along the rim. The trail ends near the Verkamp’s Visitor Center in the Village where you’ll see the oldest rock in the Grand Canyon: Elves Chasm gneiss (1.8 billion years old).
I like this trail because it’s relatively flat and is a cool way to learn about the geology of the park. I think it’s a lot more “real” to learn about the natural history of the park while walking in nature than by looking at exhibits in a temperature-controlled museum. Plus, if you start at the Yavapai Geology Museum and end in Grand Canyon Village, you can walk right into a restaurant for a post-hike snack.
The best way to gain appreciation for the areas you are hiking through is to learn the names and history of the places you see.
by Liz Thomas


Rim Trail – Trail of Time - Good to Know
Beginner
1.3 miles one-way
Flat
None required
1 to 2 hours
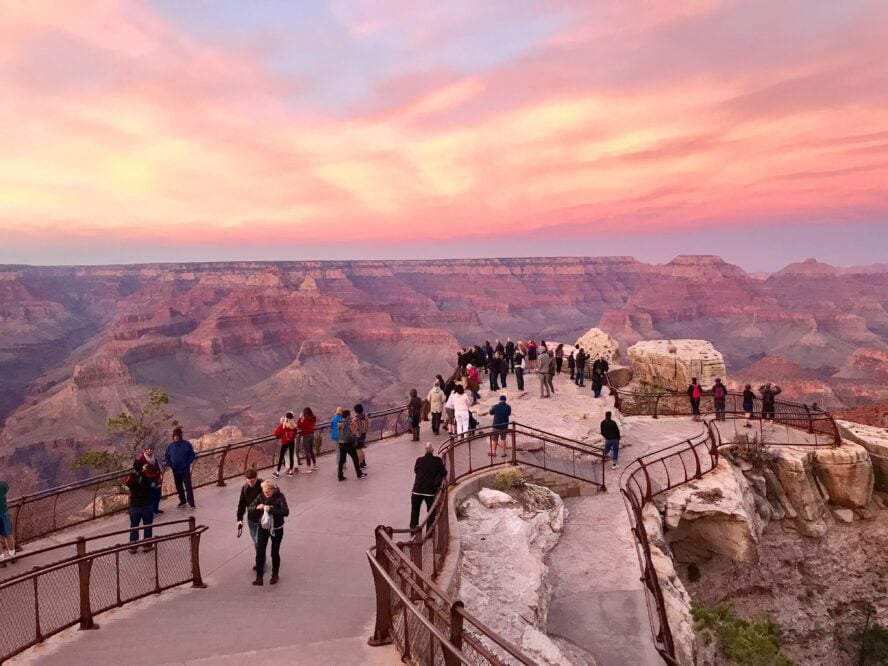
Wait until late afternoon/early evening for cooler temperatures, to beat the crowds, and catch sunset on the rim. Be sure to bring your headlamp just in case
This hike is good year round, but like most Grand Canyon hikes, spring and fall will bring the most spectacular weather
Getting there
Take the free shuttle bus to Yavapai Geology Museum. Return via the free shuttle bus stop near Verkamp’s Visitor Center. Halfway through, you have the option to shorten your trip by taking a side-trail to McKee Amphitheater and catching the shuttle bus at Shrine of the Ages.
Best Hikes In Grand Canyon’s North Rim
Grand Canyon’s North Rim is more remote and less developed than the South Rim, but the trails there are much less crowded, so you get the off-the-beaten-path vibe of backpacking Paria Canyon.
Also, since it is at a higher elevation, the views you’ll encounter are even more impressive. The hiking world is sleeping on the North Rim—and that’s a good thing!
1. Cape Royal Trail to Cape Royal
Given the quality of the views and ease of access of this trail, it’s surprising it doesn’t see more traffic. I wouldn’t go so far as to say it’s a hidden secret of the Grand Canyon, but it’s enough off the beaten path that it doesn’t attract quite the crowds you’ll find elsewhere — especially the South Rim. The trailhead is so scenic that it’s a popular place for folks to get married (permit required).

A short trail with impressive tower viewing
The Cape Royal Trail is a short, easy hike with views to rival the southern California mountains. I’ve even hiked it when there’s a little bit of shade and some breeze. There are interpretive signs along the way. The Cape Royal viewpoint has panoramic views across the canyon. You’ll have views of towers with names like Vishnu Temple or Wotans Throne or the Desert View Watchtower on the South Rim.
An interpretive sign explains which tower is which, but it’s all impressive. Regarding the exposure? Don’t worry — while it’s a big drop down from here, there’s plenty of guard railing to protect little ones.
On the return, take the side trail over Angels Window. You won’t be able to tell from the trail, but the viewing platform is built on top of a Kaibab limestone arch. From the platform, you’ll have the best view of a sweeping turn in the Colorado River called the Unkar Delta. If you’re up for more hiking after this trip, Angels Window is visible from the trailhead parking area.
Cape Royal is a bit of a drive to get to, but even the time in the car is scenic.
by Liz Thomas


Cape Royal Trail to Cape Royal - Good to Know
Beginner
0.8 mile round trip
Mostly flat
None required
1-2 hours roundtrip
Fall
This is the place to catch a sunrise or sunset from the North Rim. The drive is most enjoyable in autumn when the aspens are changing color. While you’re making the drive to Cape Royal, take the side trip to Imperial Point, the highest viewpoint in the park
Getting there
From the North Rim Entrance Station, take AZ-67 South for 15.1 miles. Turn right on Cape Royal Road and take it for 14 miles to Cape Royal Parking area.
2. North Kaibab Trail to Roaring Springs
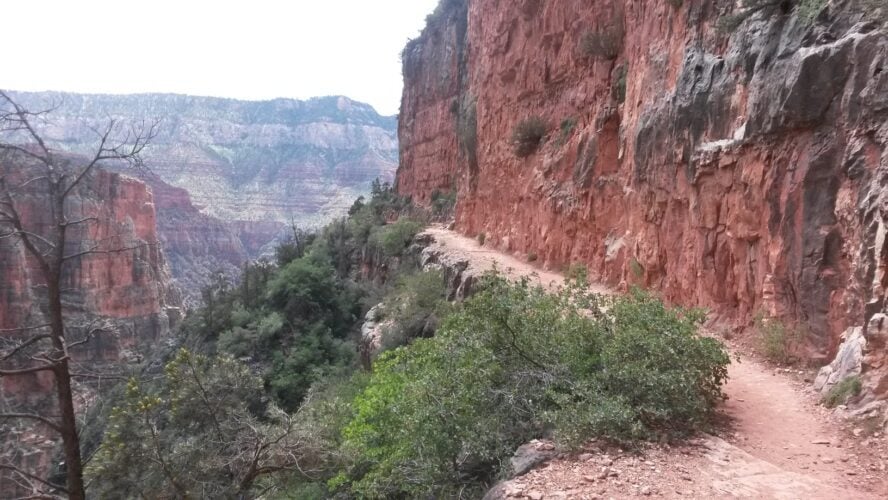
Visit the greatest spring in the park as it emerges from its source deep in the cliffs of the Grand Canyon. The North Kaibab Trail passes through almost every kind of ecosystem found from Mexico to Canada. You’ll see fir trees at the top of the rim and desert at the bottom as you pass along a (relatively) lush riparian corridor. The Redwall Limestone cliffs and tunnels on the North Kaibab Trail are one of my favorite sections of trail to be found anywhere.
Getting to the spring
Although you’re on the North Rim, Roaring Creek supplies water to lodges, residents, and visitors on the South Rim via a pipeline buried under the North Kaibab Trail.
Installed between 1965 and 1970, this engineering feat crosses the Colorado River under the Silver Bridge on the Bright Angel Trail. This will give you an idea of how much water to expect coming out of this spring, even during drier months.
Descend steeply from the North Rim through a series of switchbacks. Most people find the downhill to be the easier party. They’ve kicked my butt several times on the return back. I like having hiking poles for both the down and up here.
Hike to Redwall Bridge for the best photo opportunities
After 1.5 miles, you’ll drop from the cool, fir forest on the rim to the unforgettable red rock Supai Tunnel. Absolutely make sure to top off water bottles at the drinking fountain here (check if it’s running before you start this hike; it’s seasonal and sometimes suffers from pipe erosion).
The trek may not be as long as the Tahoe Rim Trail thru-hike, but you don’t want to tackle it without water. There’s also a pit toilet. This makes a fine place to turn around if your legs are feeling the trail.
This hike crosses bridges over the Upper Roaring Springs Canyon. The Redwall Bridge three miles in is a great spot to get 360° views and take epic photos of your friends. The ecosystems along the trail are lusher and more verdant than the South Rim, and the varied greenery almost feels like you’re backpacking in Big Sur. You may even hear Roaring Springs from Redwall Bridge.
Take in the impressive Roaring Springs
The Redwall Limestone cliffs are one of my favorite sections of trail to be found anywhere. The North Kaibab Trail is an engineering feat. Described by the Park Service as “literally hewn from solid rock in half-tunnel sections,” this section is exposed and not for those with a fear of heights. If that’s you or someone in your party, you may want to think twice about this trail.
Water and snowmelt from the plateau seep through many layers of rock in the canyon’s walls — for thousands of years now. Some layers are harder to penetrate than others, which builds pressure. Between the Muav Limestone and Bright Angel Shale, Roaring Springs bursts from the cliffs and is one of the most unforgettable sights of the Grand Canyon.
Although physically more challenging than other well-maintained Grand Canyon Trails, I think the North Kaibab is the most beautiful of all.
by Liz Thomas


North Kaibab Trail to Roaring Springs - Good to Know
Strenuous
10 miles round trip
3,000 feet elevation gain on the return
None for day hiking. Wilderness permit required for overnight backpacking trips
7 to 12 hours
May, after the drinking fountain at Supai tunnel has been turned on (check with rangers if it’s on and working)
Stay overnight on the North Rim to ensure an early start. Begin the hike before dawn
Getting there
Kaibab, AZ, and Kanab, UT, are the closest towns to the North Rim, both about a 1.5-hour drive from the North Rim entrance station. From the entrance station, drive 10.5 miles on Highway 67 south. There’s a large parking lot on the left side of the road.
3. Widforss Trail
If you’re looking for a flat hike with an epic overlook, check out the Widforss Trail. This 4.2 miles (for the shorter option) winds through a shaded forest packed with aspen glens and lupine fields, before slowly shifting into a classic Grand Canyon rim walk, complete with a scenic plateau rivaling those of the best hikes in southern Utah.
Forests, flatlands, and (a promise of) fantastic views
Follow the North Rim entrance road before taking an unpaved track right before the main visitor complex. Cross a quaint grassy clearing and you’ll reach the Widforss parking lot. Following an eastward trail, you’ll see several remote overlooks before reaching highlight #1 of the trail, the forest.

The up-to-now level path will then shift into a slight climb, as you ascend a hillside into a mixed maple, spruce, pine, fir, and aspen forest. Make sure to take a pic or two of the stands of young aspen, as their leaves shimmer in the wind. Continuing westward, the scenery slowly gets less obstructed as you near the rim, teasing with you short glimpses of what’s to come, before the path descends back down into a woodland valley.
An unexpected oasis and a well-deserved climax
As you trek through the forest, you’ll be engulfed by the soothing atmosphere, especially on windless mornings. Surrounded by aspens, ponderosa pines, and wildflowers that make the Joshua Tree hikes look drab, take the chance to meet some of the colorful birds populating the Canyon’s lusher sections. It doesn’t exactly rival the best day hikes in Yellowstone, but there’s a surprising variety of wildlife.
When you’re done, proceed along the trail and reach a wide-open picnic area. Enjoy the overlook you’ve been teased with for the past 5 miles.

This marks the end of the hike proper, but if you’re up for some more adventure, you can scramble up to Windforss Point and get an even better view. Be careful, though — it’s quite steep, and the ravine below it is nothing to scoff at.
Insider tip
Widforss is an awesome trail if you enjoy solitude and greenery. Due to the low elevation gain, you can bring your kids along. It’s also a great option for trail running.
If you’d like to scope out the trail, you can find the Widforss Trail map on the NPS site.


Widforss Trail - Good to Know
Beginner
4.2 miles for the shorter option
Mostly flat
None required
3-4 hours roundtrip
Spring through fall
Widforss is an awesome trail if you enjoy solitude and greenery. Due to the low elevation gain, you can bring your kids along. It’s also a great option for trail running.
Getting there
Follow the North Rim entrance road until you pass Cape Royal Road. About a quarter mile south of Cape Royal Road, you’ll find a dirt path. Follow it until you reach the Widforss parking area, the starting point of the trek.
Have a grand ol’ time!
We’ve barely scratched the sediment here — the passes, plains, and pockets of the Grand Canyon hide many more hiking trails. Some may skirt the rim, others follow the flow of the Colorado River, but all of them are packed with history, unique geology, and, of course, amazing views. No words can do it justice — the Canyon is much grander than you’d ever believe.