
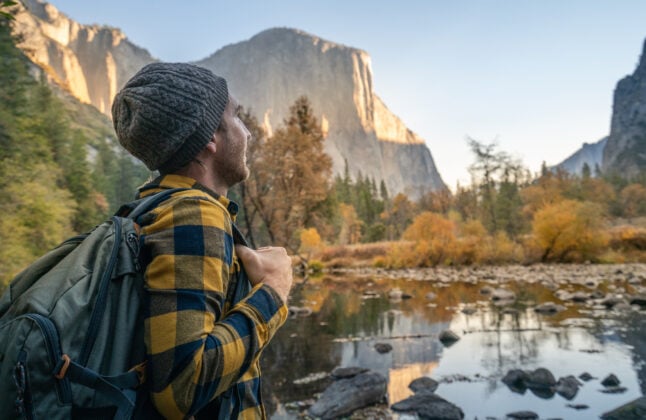
If visiting Yosemite isn’t on your hiking bucket list, it should be. It’s one of the best places to rock climb in the world, and undoubtedly one of the best places for hiking in the USA. Even when I lived on the edge of the park, the trails never got old, as these provide some of the best hikes in northern California. Whether you’re on a family road trip or a backpacker seeking solitude in the high country, Yosemite is a world class destination that you’ll want to revisit year-after-year. Here are six of the best (and my favorite) hikes in Yosemite National Park.
How hard are Yosemite Hikes?
Yosemite has hikes for all skill levels and abilities. Whether you’re looking for a family-friendly day hike you can take your little ones on, or a gruelling overnighter that will challenge and test you, Yosemite has something for you. I love that there’s something for everyone in this park. From the views to the waterfalls to the stunning scenery, whatever kind of hike you’re looking for, you’ll find it in Yosemite.
My tips for planning your Yosemite visit
For people coming on their very first Yosemite hiking tour, I recommend staying in Yosemite Valley and making reservations well ahead of time. Yosemite Valley is home to over a dozen trailheads. No matter where you stand, you’ll enjoy jaw-dropping views of granite cliffs and domes soaring above, as epic as the best Grand Canyon hikes. The Valley has plenty of restaurants, grocery stores to create trail-side feasts, and a free and frequent shuttle bus system. Lodging offerings run from camping to luxury hotels. For rest days, you can float the Merced River, explore bike trails, or watch movies about the park. Visit the National Park website to learn more about Yosemite trip planning, apply for permits, view Yosemite hiking maps and to check out your options for camping and lodging.
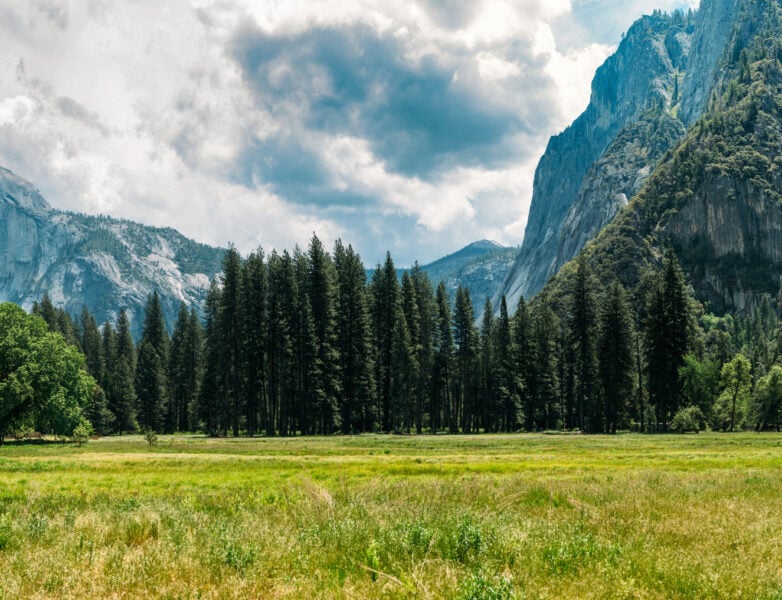
If you’re looking for Yosemite with more alpine views and fewer crowds, Tuolumne Meadows is my favorite place in the park. With alpine lakes, wildflower-filled meadows, and numerous granite domes similar to the ones you find hiking in San Diego, it’s a high-altitude wonderland. My sister worked in Wawona and says it’s the place in Yosemite to see the iconic Giant Sequoia redwoods that inspired the creation of Yosemite Park. Wherever you go in Yosemite, you can’t go wrong.
6 Top Hikes in Yosemite
Here are a few of my favorite must-see spots that you shouldn’t miss if you’re looking for the best hikes in Yosemite:
Easy Hikes in Yosemite
- Bridalveil Fall Trail – 0.5-mile round trip, best hike for families
- Tuolumne Meadows to Glen Aulin High Sierra Camp – 11.6-mile round trip, best for a family backpacking trip
- Mariposa Grove of Giant Sequoias – 15.8 miles for the whole trail, best for seeing giant sequoia redwoods
Intermediate Hikes in Yosemite
- Half Dome via the Mist Trail – 14.5-mile round trip, best for advanced hikers or intermediate backpackers
- Cathedral Lakes Trail – 7-mile roundtrip, best for alpine lovers
Strenuous Hikes in Yosemite
- Upper and Lower Yosemite Falls – 7.2 miles, best for epic waterfall views
Now, I will detail why these 6 are the best you can do while you explore Yosemite!
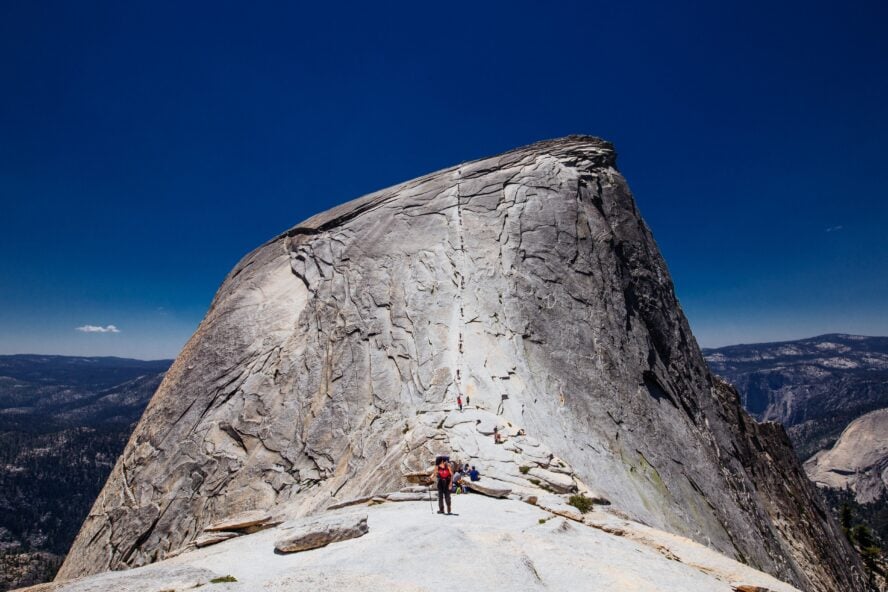
1. Half Dome via the Mist Trail
If there’s one hike to do before you die, Half Dome is it. Not only is it one of the most photographed natural wonders in the world, but the journey to its summit (8,842 feet) goes by several Yosemite Top 10 destinations, too. You’ll pass waterfalls, rivers, and wildflower-filled meadows, sights evocative of the backpacking in Big Sur, on one of the best-maintained hiking trails in the country. This is a trail you’ll never forget and won’t regret hiking. Although you need a permit, Half Dome is worth the hassle of putting in for the lottery. Whenever you see photos of Yosemite Valley, you’ll always be able to tell others, “I was there.”
Get an early start on your Half Dome hike
I recommend starting early as the trail is 14.5 miles round trip with almost 5,000 feet of elevation gain. Parking can be tricky in the valley, so take advantage of the free shuttle bus stop at the Happy Isles trailhead. I’ve found that the trail can get warm when the sun hits the big climb up the switchbacks, so bring plenty of water and a headlamp just in case it takes longer than you planned to get down.
Hiking Half Dome Trail is an incredible feat that you’ll never forget
The views along the way always take my mind off the gradual but persistent climb. You’ll ascend high above the Merced River past two waterfalls with a backdrop of Liberty Cap (another granite dome) as a guiding beacon. The Mist Trail route up Half Dome takes you from the base of Vernal Falls to the top of Nevada Falls. Every time I do this hike, I look forward to cooling off in the mist. I advise taking special care through the wet sections because the steep rock steps can sometimes be slippery. When you reach Little Yosemite Valley, backpackers can camp for a night before tackling Half Dome (wilderness permit required).


Bring shoes with sticky rubber soles and a big dose of courage for ascending the 400 feet up the backside of Half Dome using cables as a guide. It feels like walking up a low-angle ladder. There’s dramatic (albeit, scenic) drops on either side. You’ll want a good camera with a neck or wrist strap because this is a hike worth documenting from beginning until end.
A brief note on Half Dome hiking permits and lottery system
Applications for summer hiking permits open at the end of March. There’s also a short-term lottery for 50 spots available two days before your stated summit day. I’ve found the line for those spots to be intimidating (people line up at 4 am for the 11 am opening), so if you’re traveling from far, put in for the lottery.
If you only do one hike or backpacking trip in your life, Half Dome should be on your list.
Quote by Liz Thomas — professional hiker and guidebook author


Half Dome via the Mist Trail - Good to Know
As a day hike, Half Dome is considered an advanced trail. As a two-day backpacking trip, it’s better classified as intermediate to advanced. You still have to hike the 15 miles, but done over two days, your body is given more time to rest and recover.
14.5 miles round trip via the Mist Trail; alternates via the John Muir Trail can make it longer
4,800 feet of climbing
Enter a lottery at the end of March or take your chance at 50 spots available two days before your trip. If you’re backpacking and plan to camp at Little Yosemite Valley, you’ll also need a wilderness permit
It takes between 8 to 13 hours to hike Half Dome Trail. It can be done as a day hike or an overnighter.
Late June, July
If you camp in Yosemite Valley, you can get to the top of Half Dome before day hikers have reached the trailhead
Getting there
Most people rent a car and drive into Yosemite Valley from Highway 120 via the Big Oak Flat Entrance to Yosemite National Park (entrance fee is $35 per vehicle). You can also enter via the El Portal station via Highway 140. The National Park Service has a helpful guide on taking public transit to Yosemite from various airports. Amtrak and Yosemite Area Regional Transit System (YARTS) buses run daily summer service, too. Tuolumne Meadows can be reached via CA-120 Tioga Pass from US-395. Wawona can be reached by vehicle via CA-41.
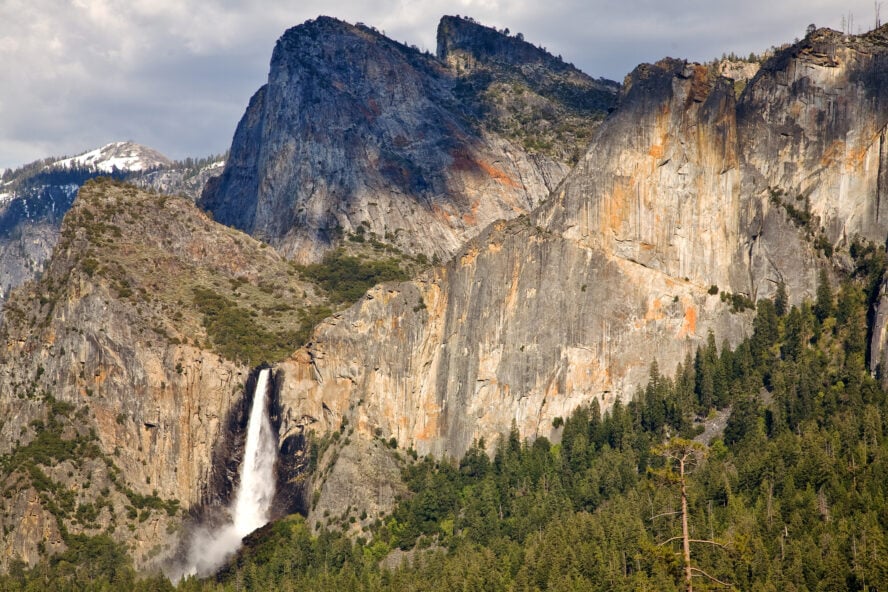
2. Bridalveil Fall Trail
Bridalveil Falls is one of the most prominent waterfalls in Yosemite Valley and also one of the easiest to access (bonus!) which is why it’s one of the best hikes in Yosemite. At 620 feet tall, Bridalveil is different from most other Yosemite waterfalls because it doesn’t have a direct drop from a glacier-carved hanging valley. Instead, Bridalveil drops at a curve, looking like a streaming veil (hence the name). It’s often the first waterfall you see as you drive into Yosemite Valley. Unlike many waterfalls in Yosemite Valley, it runs year-round.
Enjoy the windy views and cool off in the mist of Bridalveil Falls
On a windy day, the water on Bridalveil appears to not even hit the ground, moving almost horizontally at times. For that reason, the Ahwahneechee Peoples that are native to the valley called it “Pohono,” meaning “Sprit of the Puffing Wind.” This is a neat natural phenomenon, so if it’s windy, it’s well worth seeing.
If you’re wondering, “can you day hike in Yosemite?,” the answer is a resounding “yes!,” and Bridalveil Trail is one of my top choices for shorter day hikes in the park. It’s a short quarter mile from the parking area to the base of Bridalveil Falls. I like to visit these falls on a hot day because it’s a short walk and the mist of the hike is refreshing. Kids may enjoy playing at the rocks at the bottom and observing pools of water (I certainly did as a youngster). Watch them, though, as the river can be swift and the rocks slippery. This hike can get crowded. Early morning and evening see the fewest visitors.
This was one of the first Yosemite hikes I did as a kid. That experience planted a seed to love hiking for the rest of my life
Quote by Liz Thomas — professional hiker and guidebook author


Bridalveil Fall Trail - Good to Know
Beginner
Paved, but not wheelchair accessible due to grade
0.5 mile round trip; 80 feet elevation gain
None
30 minutes to 2 hours
Year-round, but the waterfall is best in early summer
Park east of the main trailhead along the road to snag a parking spot and forgo the traffic jam at the main lot. You’ll add 0.25 mile to your hike, but you’ll gain some great views crossing Bridalveil Creek. Time your hike for less popular times, like early morning or late evening
Getting there
The Bridalveil Fall trailhead is just east of Yosemite Valley. Unfortunately, the free shuttle bus doesn’t go to the trailhead. From Yosemite Valley, drive east on Wawona Road (Highway 141) or Southside Drive to the trailhead. There may be traffic jams around the main parking area (to the west), though turnover for spots moves quickly. You can park along the road about 100 yards east of the main parking area (closer to the Valley) and take a trail to the main trailhead (adding about 0.25 mile to your trip). Follow signs and the paved trail to the base of the falls.
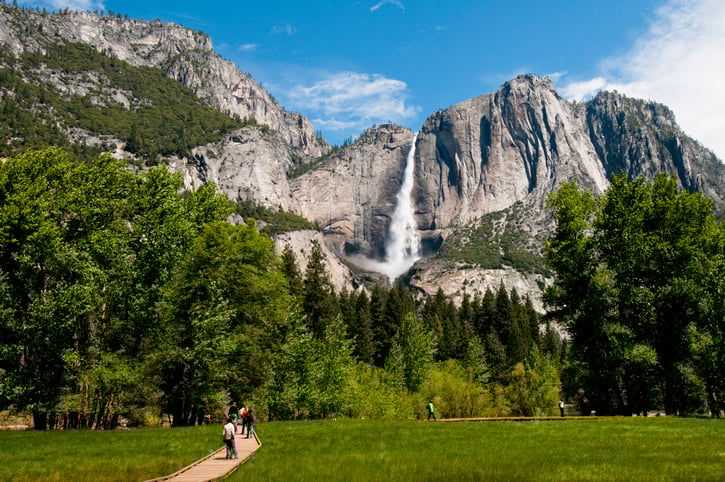
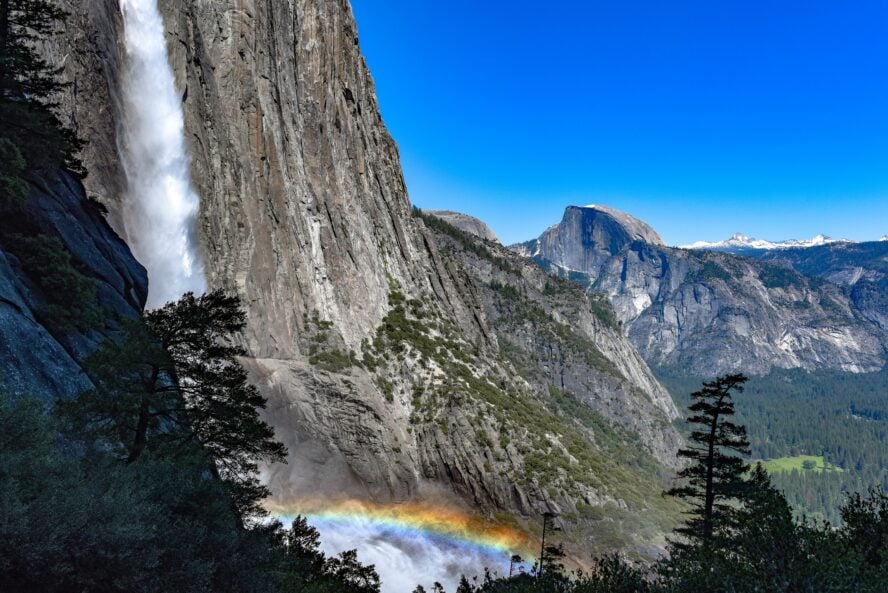
3. Upper and Lower Yosemite Falls
At 2,425 feet, Yosemite Falls is the tallest waterfall in North America. Yosemite Valley wouldn’t look like it does without these monster falls in the backdrop. On this classic Yosemite hike, you’ll walk from the base of Yosemite Falls to above the Upper Falls. It’s one of two places where you can see all the valley waterfalls from one viewpoint. It also has some of the best views of Half Dome anywhere, and the panoramas are as expansive as some of the best hikes in Yellowstone. This is my go-to hike for a good workout and to feel like I earned that trip to the Curry Village buffet.

From the top, you can watch Yosemite Creek drop thousands of feet from a hanging valley in Eagle Creek Meadows. In the spring or early summer, the roaring flow is deafening and I’ll feel cooling mist as I climb the lower switchbacks. But when I’ve been back in the autumn, the flow isn’t as intense and the spray doesn’t reach the trail. In drought years, it can dry up.
Started from the bottom, now I’m here (the top of Yosemite Falls that is)
When I first got into hiking as a kid, I found the Yosemite Falls climb challenging. For 10-year me, the scenic guardrail-protected view of the Lower Falls from Columbia Rock (a little more than a mile and 1000 feet of gain from the Yosemite Falls trailhead) was a fine end destination. As I became an intermediate hiker in my twenties, I was thrilled to make it higher to the guardrail-protected Lower Yosemite Falls Overlook. It’s possibly the only safe spot to get the rare view of the Upper, Middle, and Lower Falls. Now, as an advanced hiker, I enjoy the challenging climb to the top of Upper Yosemite Falls. I can’t help but feel alive looking at the point where the falls drop thousands of feet off a cliff.
Tailor your hike to Yosemite Falls based on your party’s energy level. Whether you visit Columbia Rock or the tippy top, it’s an experience you won’t forget. Humans are so small next to that much flowing water. There are plenty of fenced viewpoints along the way, but take care near the water’s edge and near steep drops.
A transportation tip — take the shuttle or ride a bike
To avoid the parking hassle and Yosemite Valley traffic (yeah, it’s a thing), I always take the free shuttle bus to the trailhead (either Lower Yosemite Falls or Yosemite Falls Trailhead stops). If you rent or have a bicycle, the Yosemite Valley paved bike trail goes to both trailheads, too. There are even racks to lock up.
Yosemite Falls is a butt kicker, but it’s really rewarding to get that view of the valley knowing I got there by my own two legs. I know I earned my trip to the buffet, too.
Quote by Liz Thomas — professional hiker and guidebook author


Upper and Lower Yosemite Falls - Good to Know
Advanced to hike the whole thing. Intermediate for viewpoints along the way
7.2 miles out-and-back to top of Yosemite Falls from Yosemite Falls Trailhead
2,700 feet
None required for a day hike
Allot 6 to 10 hours to hike the entire Yosemite Falls Trail to the top of Upper Yosemite Falls.
If you’re feeling strong, continue for another 0.9 mile to Yosemite Point for a view of the falls and the Valley from above. Starting at Lower Yosemite Falls Trailhead makes your hike 0.4 mile longer, but it’s neat to start at the base of the Lower Falls.
Late spring or early summer, when waterflow is bolstered by snowmelt. Check the Yosemite Falls webcam for conditions
Getting there
From Yosemite Valley, take the free shuttle bus to Camp 4 (Stop #7) or El Capitan (Stop #2). There’s a Yosemite Falls parking area across the street from Camp 4. To access the Lower Yosemite Falls, get off the bus at the Lower Falls Trailhead (#6). The hike from the Lower Falls Trailhead adds 0.4 mile to your trip.
4. Tuolumne Meadows to Glen Aulin High Sierra Camp
I’ve hiked the Tuolumne Meadows to Glen Aulin High Sierra Camp Trail more than a dozen times and it remains one of my favorite hikes anywhere. To get to the Glen Aulin High Sierra Camp via Tuolumne Meadows you’ll hike past Tuolumne River, Parson’s Lodge, and Soda Springs. Start at the free shuttle bus stop and walk across a meadow with 360° views of glacier-carved granite domes in all directions. One of the most panoramic views in the Sierra, historians say Tuolumne Meadows is the spot where John Muir dreamed up the national park system.
Something for the kids on the Glen Aulin hike
As a child, my family found the half-mile hike to the bridge over the Tuolumne River to be the perfect length. When the river is gentle, it’s fun to play on the sandy beaches or fish from the banks (fishing permit required). Continue to the wooden shed that protects Soda Springs, a naturally occuring sodium carbonate source that bubbles from the red earth. Nearby is Parson’s Lodge, a stone cabin built by the Sierra Club in 1915. It’s on the National Register of Historic Places.

Hiking to Glen Aulin High Sierra Camp — a challenging day hike or a more moderate overnighter
As an adult, I now continue past the wilderness signs to Glen Aulin High Sierra Camp. I’ve done it as a day hike and as a backpacking trip to the camp. While you’ll pass many trail junctions along the way to Glen Aulin, they’re all marked by rusty folksy-looking signs. Admittedly, the mileage on the signs is notoriously off. My GPS shows it’s 5.6 miles and about 800 feet of elevation loss to Glen Aulin (that means 800 feet gain on the return).
Where to camp on the Glen Aulin hike
Glen Aulin High Sierra Camp is part of a system of camps across the Sierra that can best be described as “glamping before it was cool.” It’s a car-free backcountry campground of canvas tents and cots, situated under a waterfall. I’ve been told that it’s serviced by a chef who will make you a steak if you have a reservation (though I’ve had no such luck myself!). For normal backpackers bringing in their own tent and food, the camp still offers potable water, a small store with lemonade and snacks, and clean outhouses.
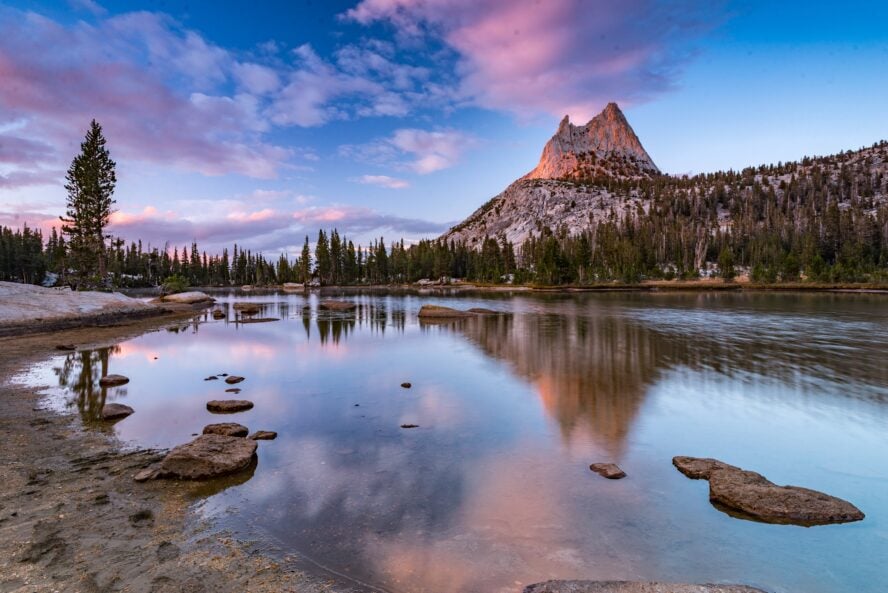
Tuolumne meadows to glen aulin with views of Cathedral Peak
On the way to Glen Aulin, you’ll follow the Tuolumne River over the skirts of glacier-polished domes. The hike offers incredible views of the jagged Cathedral Peak, which rises so high that the glaciers couldn’t smooth its ragged edges. You may get your feet wet crossing a few creeks after the snowmelt, but there are often log “bridges.” As you descend the upper reaches of the Grand Canyon of the Tuolumne River, you reach roaring Tuolumne Falls tumbling down white granite. The last bridge over the Tuolumne River has you staring at White Cascade, a waterfall that tumbles into a chilly pool that’s swimmable for the brave.
Glen Aulin is the perfect first wilderness backpacking trip with relatively little climbing, incredible scenery the entire way, and a nice camp, waterfall, and swimming hole at the end
Quote by Liz Thomas — professional hiker and guidebook author


Tuolumne Meadows to Glen Aulin High Sierra Camp - Good to Know
Beginner to the Tuolumne River; intermediate to Glen Aulin; beginner backpackers to Glen Aulin
11.6 miles round trip
800 feet of elevation loss/800 feet of climbing on the way back to the car
No permit required for day hiking; wilderness camping permit required for backpacking.
6-8 hours; overnight backpacking trip
June through September
Visit in early morning for the best waterfall photography (high altitude sun on white granite can blow out your waterfall pictures) and to see pink alpenglow on Cathedral Peak
Getting there
Tuolumne Meadows is best reached by the Tioga Pass Yosemite Entrance Station on Highway 120 (fee is $35 per vehicle). You get there via the US-395 corridor along the Eastern Sierra, considered one of the most beautiful drives in the country. From the town of Lee Vining, it’s about 12 miles to Tioga Pass. You can fly into Reno, Nevada, and rent a car for a 2.5 hour drive to the Park. Otherwise, Tuolumne Meadows is accessible from Yosemite Valley after about an hour of scenic driving. For public transit, the Yosemite Area Regional Transit bus runs during the summer; its range includes Reno and Yosemite Valley, and as far south as Mammoth Lakes and Lone Pine.
5. Cathedral Lakes Trail
I think the Cathedral Lakes Trail is quite possibly the best hike in Tuolumne Meadows. Cathedral Peak and Cathedral Lakes is a place for alpine lovers with views you just can’t get in the Valley. In addition to Glen Aulin, Cathedral Lakes was one of my go-to spots for taking out-of-town guests when I lived just outside the Park. You’ll cruise through alpine meadows to alpine lakes at almost 10,000 feet of elevation. Summer wildflowers are at their prime in wet meadows and the forest floor from late June to late August, and they’re as vibrant as the ones you’ll find on the best Joshua Tree hikes.
Cathedral Peak gets its name because it looks like a Gothic place of worship, with Eichorn Pinnacle towering over it like a belfry. Cathedral Basin was carved by glaciers, but the towers remain because they rose above the ice. Cathedral Peak remains jagged along with Echo and Tesidder Peaks, which also dominate the upper lake’s south shore.
Hike along part of the famous John Muir Trail
John Muir has the first documented ascent of Cathedral Peak in 1869. He did it in heavy, leather boots without a rope. I’ve climbed the peak several times and think of him often. The hike to Cathedral Lake is mostly on a trail named after him, the John Muir Trail. It’s a famous distance trail I’ve hiked several times that runs from Yosemite Valley to the top of Mt. Whitney. Cathedral Lakes is one of my favorite spots along the whole 214-mile hike.
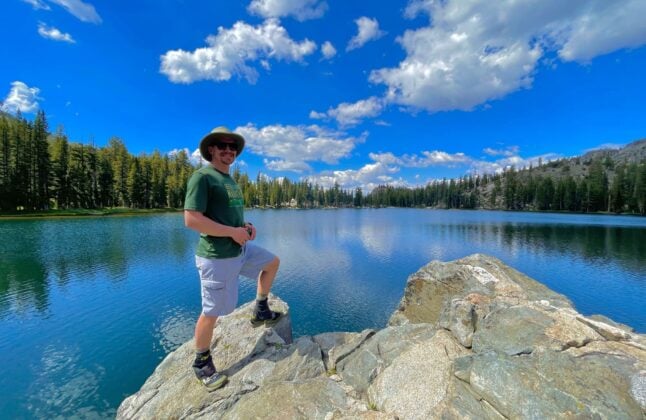
You have the option to go to the Upper Lake or the busier Lower Cathedral Lake (0.5 mile off the main trail, but shorter in distance and less climbing). I’ve noticed my body feels the altitude on this hike. After all, it begins at 8,500 feet. The first mile has the bulk of the ascent and feels strenuous. You can decide which lake to visit based on how you feel when you reach the signed intersection for the Lower Lake. Whichever lake you visit, I suggest taking the climb slowly, staying well hydrated, and readjusting expectations about your speed. Either lake has flat, granite spots for picnicking and jaw-dropping views.
This hike takes you to the base of Cathedral Peak, which is visible throughout Tuolumne Meadows and is one of the most beautiful rock formations in Yosemite.
Quote by Liz Thomas — professional hiker and guidebook author


Cathedral Lakes Trail - Good to Know
Moderate
7 miles roundtrip
1,000 feet elevation gain
None for day hiking. Wilderness permit required for overnight backpacking trips.
4 to 6 hours
July to September. Enjoyment of this hike depends on whether snow obscures the trail or the bugs are out.
Visit in autumn. The wildflowers may not be out and the meadows may not be verdant, but you won’t have to worry about snow, swamps, mosquitoes, or crowds.
Getting there
Tuolumne Meadows is easiest to reach by driving the US-395 corridor along the Eastern Sierra; this is considered one of the most beautiful drives in the country. From the town of Lee Vining, it’s about 12 miles to Tioga Pass into the Park. You can fly into Reno, Nevada, and rent a car for a 2.5 hour drive to the Park. Otherwise, Tuolumne Meadows is accessible from Yosemite Valley after about an hour of scenic driving. For public transit, the Yosemite Area Regional Transit bus runs during the summer from Reno to Lone Pine and into Yosemite Valley.
6. Mariposa Grove of Giant Sequoias
Mariposa Grove is home to Yosemite’s most famous living attraction: 1,000-year old Giant Sequoias, the largest living things in the world. This grove of Sequoiadendron giganteum is the place that inspired Abraham Lincoln’s protection of Yosemite National Park. Even if you aren’t a tree nerd, after visiting, you’ll feel inspired, too. There are a variety of hiking options here, from shorter day hikes you can do with your kids to strenuous hikes that will challenge — and inspire — you.
In Mariposa Grovel, you’ll hike through groves of trees that tower above like characters out of Tolkein. If you see no other Giant Sequoia, make sure you see the 1,800 year-old Grizzly Tree, the oldest tree in the Park (that we know of). You can literally walk through the California Tunnel Tree, a living tree whose center has been bored out. My family has a photo there and yours will want one, too. The Bachelor & Three Graces are four giant trees who are so close to one another, their roots are twisted together. The Fallen Monarch is a downed sequoia trunk that ecologists suspect has been there for centuries.

Choose your own hiking adventure in Mariposa Grove
Depending on the energy of your party, you can visit the Mariposa Grove as a 0.3 mile loop on the Big Trees Loop Trail, a 2 mile loop on the Grizzly Giant Loop Trail, or a 7.6 mile hike on the Mariposa Grove Trail (view the trail map here). The elevation change on the 0.3-mile trail is negligible, but the 2-mile hike to the Grizzly Giant has 300 feet of gain. As a more advanced hiker, I enjoyed the 1,200 feet of climbing on the longer out-and-back to Wawona Point. It has killer views of Wawona Valley. My sister lived and worked as an ecologist in Wawona and says long Guardians Loop or Mariposa Grove Trail are the places to go to get away from the crowds in the rest of the grove.

A true Yosemite gem — less crowded with all the appeal
The Mariposa Grove area was recently renovated to better protect the trees and manage visitors, so expect shiny, new amenities. I think the best option for parking is just inside the Southern Entrance of the Park at the Mariposa Grove Welcome Plaza. The reason is that the gate to Mariposa Grove Road is closed at 7:30am and most of the other parking areas are limited to cars with disability placards. If you visit in the winter, the road to the grove is closed, but you can snowshoe there (it’s fun).
Wawona feels more like a community than other built-up areas in the park. There’s permanent residents, a school, and even live music and barn dances during the summer. Come for the trees, stay to experience a less hectic Yosemite than what you’ll find in the Valley.
The outer loop trail and making your way to the upper grove is the Must See of Wawona...You can appreciate how a forest changes over a short distance.
Quote by Kat Thomas, former Wawona resident and ecologist


Mariposa Grove of Giant Sequoias - Good to Know
Beginner for the Big Trees Loop; beginner to Intermediate for Grizzly Giant Loop; intermediate for Guardians Loop or Mariposa Grove Trail
0.3 miles for the Big Trees Loop to the Fallen Monarch; 2 miles for the Grizzly Giant Loop to the Fallen Monarch, Bachelor & Three Graces, Grizzly Giant, and California Tunnel Tree; 6.5 to the Guardians Loop, which views an additional grove; 7.0 miles for the Mariposa Grove Trail which includes Wawona Point
Negligible for Big Trees Loop; 300 feet gain for Grizzly Giant Loop; 1,200 feet for Guardians Loop and Mariposa Grove Trail
None required for day hiking
1-2 hour for Big Trees Loop and Grizzly Giant Loop; 3-5 hours for Guardians Loop or Mariposa Grove Trail
Fewer crowds in spring and autumn
If you’ve got the energy, the Upper Grove, Wawona Point, and the Outer Loop Trail have fewer visitors than the lower groves
Getting there
From Fresno, take Highway 41 to the Southern Yosemite Park Entrance. Just after the entrance station, park at the Mariposa Grove Welcome Plaza and take the free shuttle to the trailhead. From Yosemite Valley, take Wawona Road. The National Park Service has a helpful guide on taking public transit to Yosemite from airports. Yosemite Area Regional Transit System (YARTS) buses run limited summer service from Yosemite Valley.