I was once climbing with a friend who was in her 50s; she started climbing in the late 80s, back when the climbing community was split between lycra on one side and denim on the other. I was new, out for only my fifth or so time at a cliff that had no bolts to use as protection. I was espousing my excitement for obtaining my first rack of “trad gear.” She scoffed at the phrase and responded, “I’ve always just called it gear.”
Wondering what the heck my friend was talking about? Want to know what trad climbing is and how it differs from sport climbing? Maybe you’ve heard of “racks” and “anchors” but don’t know quite what those terms mean. If you’re looking for a primer on traditional climbing and want to learn to trad climb, you’ve come to the right place.
As an AMGA-certified Rock Guide, I spend roughly 250 days a year in the mountains, either guiding or climbing personally. I have been climbing since 2008 and professionally since 2012. With these demands, I have had to tweak and manipulate my skills and gear needs to suit my own desires and those of trusting guests. I also travel to many different areas and, therefore, many different rock types as well, which puts further demand on the specificity of my gear choices and my skills. I hope to take these lessons I have learned over the last decade and give you a breakdown of the genre so you can learn to trad climb and have the adventure yourself!
The different types of rock climbing
Climbing, in its current form, is generally separated into categories based around many things, but perhaps none more universal than how we protect a pitch. (A pitch is a section of rock that requires a rope between two belays, or between the belay and an anchor.) Indeed, there is the rock itself that can be either slab, face, or crack climbing; however, it is the methods we use to protect these pitches that lend us terms such as “sport” and “traditional,” or “trad,” as the shorthand term most commonly used. This is typically defined only when there is a need or desire to lead a pitch, wherein a “leader” ties into a rope that is stacked entirely on the ground and then climbs the pitch on belay, placing or clipping into intermediate pieces of gear as they climb to prevent a ledge or ground fall. This is opposed to climbing on “top rope” where the rope is placed in an anchor above you, and fall consequence rarely comes into consideration.
Sport climbing vs. trad climbing
So, what is the difference between the two? Sport climbing is generally difficult to define, but recent ventures by the American Alpine Club have sought to add more concrete criteria. Sport climbing can be defined as involving bolts and quickdraws wherein all protection is pre-placed and permanent. All bolts adequately protect the leader from ground and ledge falls. This is what you typically see in gyms and on some of the world’s hardest climbs because the entire pursuit is designed to focus attention away from equipment challenges and towards physical and athletic difficulty.
What is trad climbing?
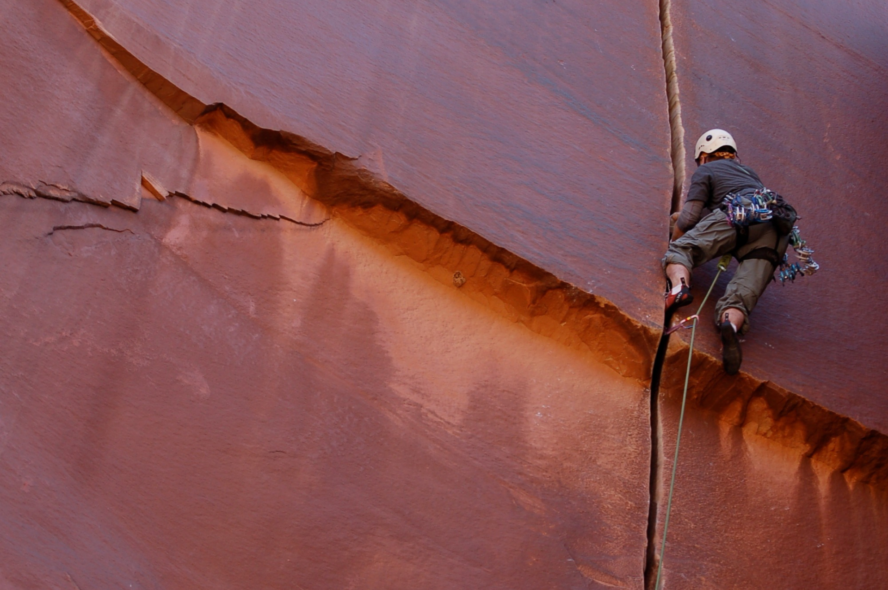
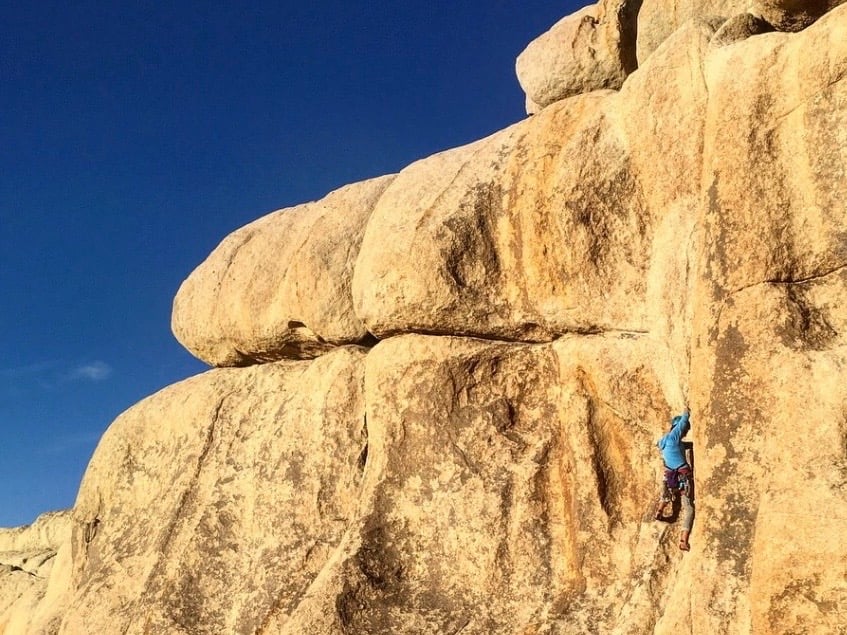
In trad climbing, the leader places the gear themselves to be removed later and may arrive at an anchor that is bolted or one they must construct themselves and either leave gear or, more likely, walk off. Perhaps this is what makes the allure of trad rock climbing so appealing to many; since, apart from a crack climb, there isn’t a line of bread crumbs to follow. One must employ a greater degree of discretion and planning while being knowledgeable of traditional protection equipment such as stoppers and cams (more on that later), which must be placed in the rock’s proper features from a stance that may or may not be tenuous. Time slows down, and the climbing takes on a more cerebral character. This is why traditional climbing is both an exciting and enticing venture, and one that requires a great deal of respect and appreciation before undertaking the challenge for yourself.
A little history and the big name players
Who is the best trad climber in the world? This isn’t easy to answer, but it’s also enlightening towards traditional climbing at the same time. In sport climbing, we practically only have one facet to point at to assess prowess, and that is fitness. Due to the practice of having fixed protection (modern climbing bolts) and often having the quickdraws already clipped to them, this only leaves the need to clip the rope to the draws while climbing, meaning that the only thing for the climber to focus on is the climbing itself. This allows us to say definitively that the best sport climbers are those that have achieved the hardest grades (5.15a-d).
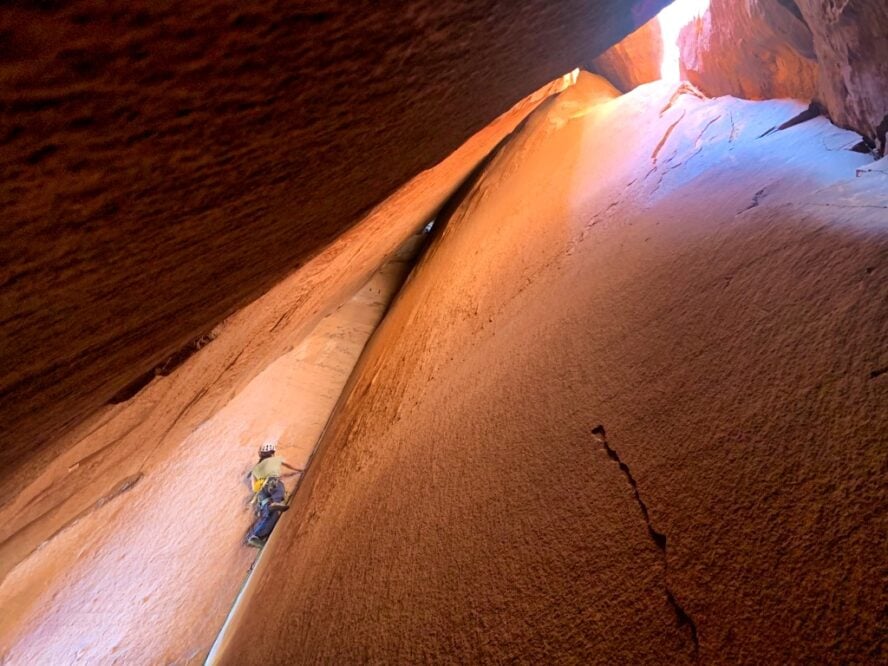
This is complicated by trad climbing because of the added skills needed to climb at a world-class level, assess the need for gear, place the appropriate kind of gear in a way that exploits the gear’s maximum holding capability in the event of a fall, and also, not think about the possibility that the gear may fail anyway (often the gear is very small on these difficult routes, unless they are off-width cracks like the 5.14b Century Crack near Moab, UT). This all adds emotional challenge to the difficulty. When taking all of this into consideration, the number of climbers at this level drops quite a bit. Climbers like Tommy Caldwell, Alex Honnold, Steph Davis, Molly Mitchell, Beth Rodden, Lonnie Kauk, Sonny Trotter, and Will Stanhope all come to mind, along with many others.
The hardest climbs
Given that traditional climbing is such a step up from a risk standpoint, it may come as a bit of a shock to know that, at least in North America, we do not typically change grades based on style (sport vs trad). While other countries and areas, like the UK, have scales for taking the “full experience” into account (E grade). We’ll stick with the Yosemite Decimal System (YDS) for simplicity’s sake. Currently, the hardest accomplished sport climbs are Silence (5.15d) by Adam Ondra and Bibliography (5.15d) by Alex Megos. Perhaps because there are fewer steep cracks than walls, and because one must stop, assess and place the protection from a stance, there are many more difficult sport routes than trad.
Many folks such as Beth Rodden and Ethan Pringle have sent 5.14c on routes such as Meltdown inYosemite, one of the best trad climbing destinations in the world, and Pura Pura, in Italy’s Orco Valley, near Astoa Valley. It should be noted that these and many others were done without pre-placed gear, which is sometimes common on these harder routes. Tribe, a possible 14d route, has been recently done by Jacopo Larcher and has since seen a second ascent by James Pearson. It might seem unfair to lend a grade to a trad line as we would a sport climb (I agree), but this is another reason to approach traditional climbing with a sense of humility.
Is trad climbing more dangerous?
By definition, trad climbing is more dangerous than sport climbing. To climb a traditional pitch, one must have at minimum a complete, foundational understanding of the following: one’s own climbing ability, reading and interpreting terrain as well as available gear, route finding, adequate inspection of fixed gear (if it exists), passive vs active traditional protection options, fall consequence evaluation and competence, and rope management. Many of these overlap with sport climbing, but most are a pursuit wholly unique to traditional climbing.
Becoming a trad climber
So given this, when are you ready? The answer is going to be unique to every individual, but there are some steps you can take to evaluate yourself. The most simple solution is to hire an AMGA-certified Single Pitch Instructor or take a climbing course if you have the financial resources to do so. However, that won’t be feasible for everyone, so here is another pathway.
First, get to the point where you feel comfortable and competent climbing up to 5.10 or even 5.11 in the gym on lead. To get there, take a lead and belay course from an AMGA-certified Climbing Wall Instructor. This will give you a solid foundation of fitness, personal movement awareness, rope management, proper belay technique and strategy.
At some point, find a friend who is highly competent at traditional climbing and follow them up pitches. A LOT! Instruct them to leave their gear in place. Do this on top rope so that you can purely focus on movement by removing the psychological and emotional burden of the lead. Eventually, start to evaluate how the leader placed the gear ahead of you. Notice the spacing, the relation to the features below, above and around, and how that translates to fall consequence and avoidance. Notice the feature the gear was placed in and what kind of gear was chosen. Ask a lot of questions about these concepts to the leader. This will also encourage some learning on the part of the leader as well as it requires them to reevaluate and pay attention to their own techniques and way of doing things.
Read up on trad climbing
Buy a book about traditional climbing. I recommend Ron Funderburke and Nathan Fitch’s book, “Climbing: From Sport to Traditional Climbing.” This will give you a foundation of knowledge to begin working with (alongside an article like this, of course.) Ask to borrow your friend or mentor’s gear to play with on the ground. Get used to how protection feels when you place it in the rock. Begin to understand how the gear interacts with the rock in its placement. Carefully weight the pieces by tethering to them (BE CAREFUL: don’t look directly at the piece, lest you take one to the eye if it fails, and make sure you have something soft to fall on in case of a failure).
An exercise for new trad climbers
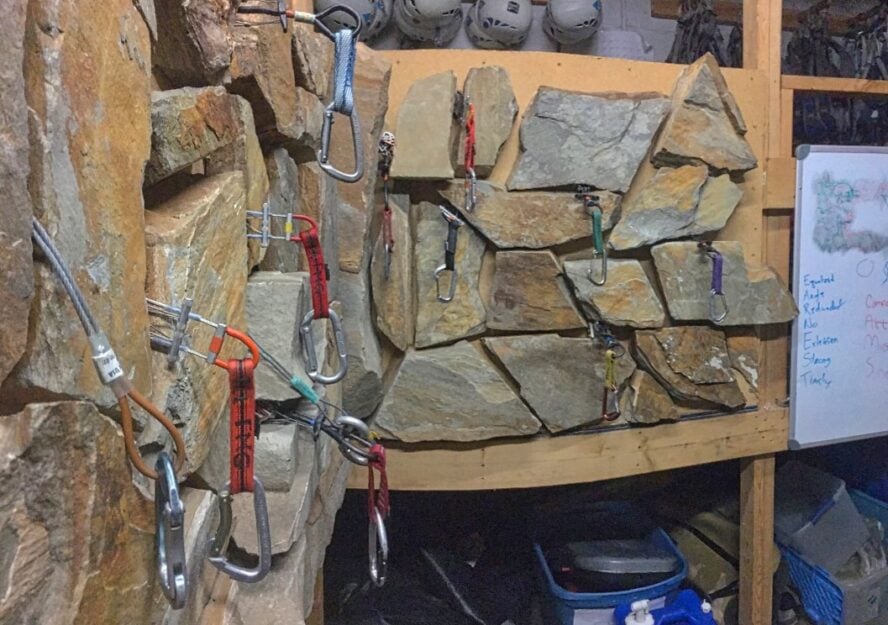
One exercise that I like to have my students undergo is to choose a cliff line that has ample cracks at the base and is about 20-30 meters wide. Begin at one end of the cliff and walk the base, placing gear in the cracks as you go. Each time you arrive at a possible placement, give yourself two opportunities to place the gear properly. If you fail to place the piece soundly, leave it, take a picture and move on to the next placement. Later, review and rate your placements on a scale of 1-5 with 5 being the best possible placement. Compare the pictures of your placed gear with those in the book(s). Buy a book on building anchors from publishers such as Falcon Guides or The Mountaineers. Begin constructing anchors and rate them much the same way with similar exercises.
Consider hiring a climbing guide
Now, this is the perfect time to consider hiring a guide or instructor. It is at this critical juncture of knowledge acquisition and practical application that a certified Rock Guide or Single Pitch Instructor can step in and assess where you are, give you feedback and start to actually put the proverbial rubber to the road in an appropriate format. Often, I will give students a climb that I will lead and have them follow, cleaning the gear. Afterwards, with a top rope in place, I will have them tie into one side to top rope to climb on and also the other side of the rope that is not being used to act as a pretend lead line that they don’t need to be belayed on, but will carry up the route with them. I will give them the rack to climb with and leave the top rope somewhat loose. They will now climb and place protection as if they were leading.
Afterwards, I climb the pitch, assessing gear and taking pictures if need be for feedback. We may do this on many different pitches and also construct anchors to give a better understanding of the entire traditional system. This kind of practice and assessment under the guidance of a mountain professional is invaluable and should be considered mandatory practice for anyone looking to start traditional climbing themselves.
What do you need for trad climbing?
What is a “rack” anyway? Modern protection has come a long way from the first rock climbers. Of course, moving protection like ice axes, crampons and rock protection like pitons have existed for more than 100 years, but when the technical demands of rock climbing, and more specifically free climbing on rock, became common, the protection needed to evolve in order to meet the demands. Of course, you may wonder, “What about aid climbing?” This is a good question, but perhaps one best discussed another time. For now, let’s focus our efforts on free climbing and the two most simple forms of traditional protection: stoppers and cams.
Stoppers — where they started and how far they’ve come
People using their hands and feet on the rock with rope for fall protection really started to pick up steam in places like Snowdonia in Wales and Tahquitz and Yosemite in the USA. Climbers like Joe Brown in Wales often walked along the Snowdon railway to approach areas on Cloggy, a popular early rock venue. On the way, they would pick up machine nuts from trains, sling them with nylon webbing and cord, and slot them into constrictions in cracks, which is what passive gear (no moving parts) are best for. These were the first, literal “nuts,” often referred to as stoppers, chocks or wires (for the smaller sizes).
Stoppers of today have tapered shapes that allow them to fit a variety of constriction shapes to allow maximum surface contact which is where they derive their strength. Because they have no moving parts, they are considered “passive protection,” and there is no exponential increase in force beyond the force generated by the weight of a climber, so they are better for placements where rock quality may be of more concern when no other protection is available. “Chock craft” takes more time to perfect than the next type of protection we will discuss, so get out there and practice with them on the ground!
Climbing cams
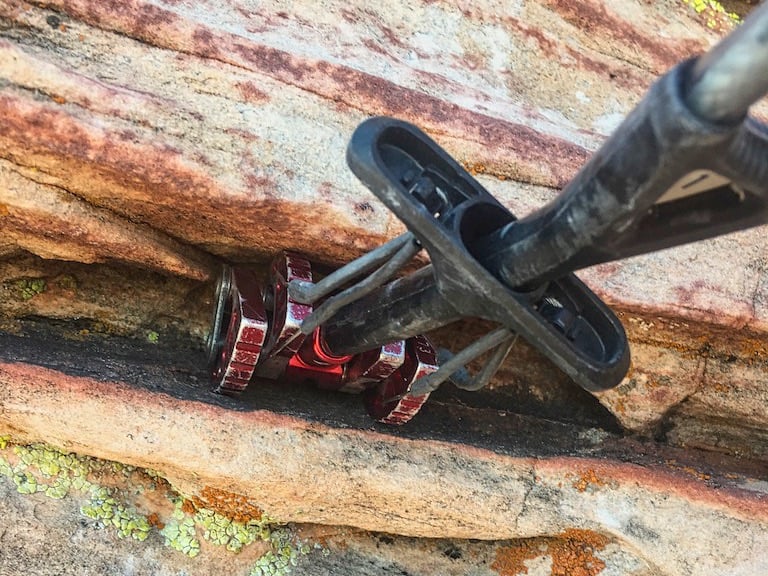
In the 1960’s in the USA, a Yosemite climber by the name of Ray Jardine became aware of the need to protect the often parallel sided (no constrictions for passive pro) cracks of Yosemite and the desert cracks of Utah. An actual rocket scientist, Jardine invented the first Spring Loaded Camming Device (SLCD or cam) and called it the “Friend,” a name still used by the current makers, Wild Country. The cam is ingenious because of the way it operates when placed.
First, the cam is retracted using a trigger on a stem which pulls the lobes down, making them smaller (13.75 degree angle, though many variances exist today) so that it may be placed in a crack smaller than the fully open cam. Once in a parallel sided (they fit in many types of placements) crack, the trigger can be released, allowing the springs connected to the lobes to begin opening and then make contact with the sides of the crack. Once in contact, the lobes continue to try and open and “roll” towards full size like an umbrella trying to open in a tight space. When force is applied, a cam will become even tighter as the friction of the lobes against the rock is increased, placing exponentially higher forces on the rock around them. For this reason, it is best to place them in excellent rock quality and avoid features like hollow flakes, icy or dirty cracks and brittle rock.
The “one size fits most” approach to building your rack
So knowing all of this, where should you start? First of all, who should you buy from? There will undoubtedly be a range of opinions, but I will narrow this window to give you what I believe to be the “one size fits most” approach. A good combination of cost effectiveness and versatility. In my opinion, the two most versatile companies making gear (especially cams) are Black Diamond and Metolius.
Metolius sizes are between the Black Diamond sizes, so they compliment each other well. As you continue your climbing, you can sell some of your rack (or not) and purchase more specialized gear from companies like Fixe, Wild Country, DMM or Totem. This is not to say that these companies are not also excellent options, but they do tend to be a bit more expensive and sometimes lean towards specialty products.
For stoppers, many folks love Wild Country and DMM offsets (cams and stoppers that are smaller on one side and larger on the other which are better for flared placements). However, many newer climbers find these harder to remove, which brings me to why I still use Black Diamond over others. As a guide, I want my guests to have as little trouble removing gear as possible while still being extremely versatile, so I don’t have to have a different rack for every environment I’m in. This is why I will be describing my version of a rack in these sizes. This is a big investment, and one that you want to do with some thoughtfulness.
Your trad climbing gear list
For the reasons of a diverse set of needs, I’ll break down three categories of a rack. A “light rack” best used on shorter single pitches with diverse gear options and perhaps added together with a friend. A “standard rack,” although there is no such “standard,” is a moderately heavier option that can be used on most any route, including multi-pitch routes, generally by itself.
Finally, there’s a “full rack,” which includes doubled up gear of the same size and some alternative pieces. Buy a “rack pack” of non locking, wire gate carabiners without a nose hook, that are color coded to your cam colors. All of these factors make using your gear far easier. (Camp makes an excellent carabiner for this purpose, the Dyon).
My recommendations for building your rack:
A Light Rack:
- Black Diamond single set of cams from sizes .2 (yellow) to 3 (blue)
- Black Diamond Stoppers from 4-13 (grey to red) w/ nut tool

Standard rack: Cams in the middle; added cams on the right; stoppers middle left; tri-cams with nut tool bottom left. Photo by Cody Bradford

A Standard Rack:
- Black Diamond single set of cams from sizes 0 (green) to 3 (blue) or 4 (grey)
- Add another set of cams from .4 (grey) to 2 (gold) or 3 (blue)
- Black Diamond stoppers 4-13
- Can also add a set of Camp tri-cams: two pink and a blue with a nut tool

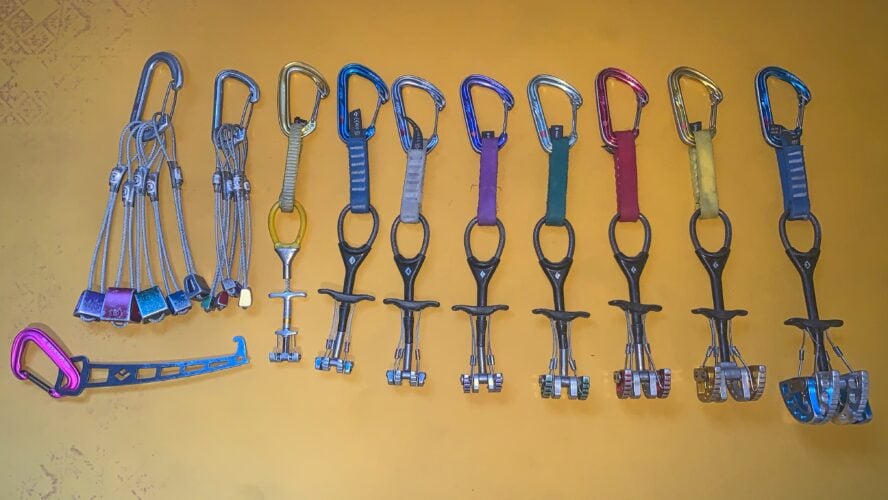
Full rack: cams on the right; stoppers on the left; nut tool far left; tri-cams bottom left. Photo by Cody Bradford

A Full Rack:
- Black Diamond single set of cams from sizes 0 (green) to 5 (purple)
- Add another set of cams from .1 (red) to 3 (blue)
- Black Diamond stoppers 1-13
- Can also add a set of Camp tri-cams: 2 pink and a blue with a nut tool
Now that you know what trad climbing is, are you ready to give it a shot? Heading out with a guide while you learn to trad climb offers immense value. You’ll learn faster, get expert advice, and most importantly, stay safe. Learn more about the locations you can head to for a private day out of guided climbing, and I’ll see you on the rocks!
If you want to hear Cody talk more about climbing, watch his 57hours Epic Adventure Webinar on Rock Climbing in Red Rock, Nevada: