

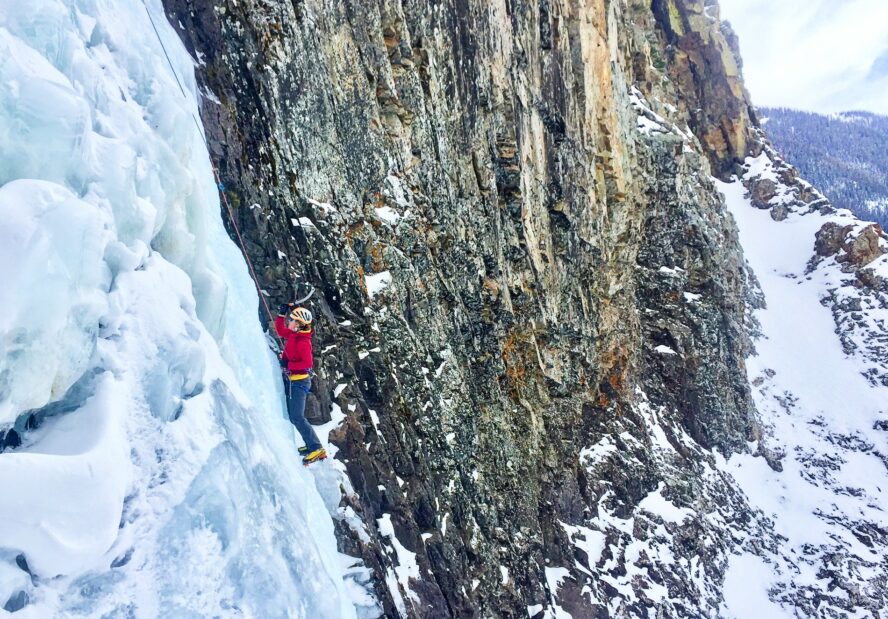
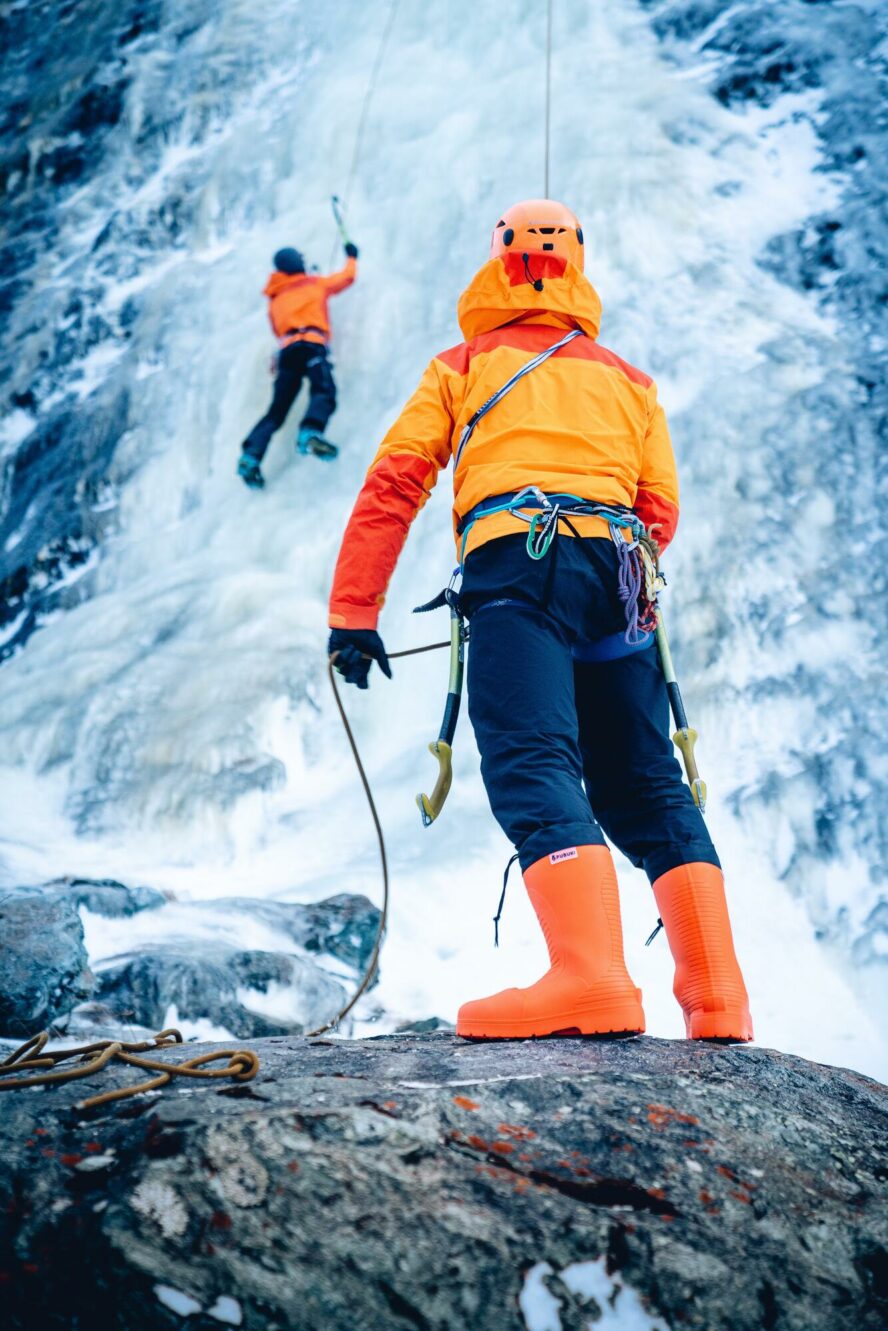
My first visit to Ouray, Colorado started with a white-knuckled drive in a snowstorm down the Million Dollar Highway. Navigating the steep, winding mountain road, no guardrail in sight, had me looking forward to the security of a climbing rope and tight belay.
Relieved to arrive, my partner and I spent two days ice climbing at the Ouray Ice Park to unwind. Thanks to the easy access of around 150 human-made routes—formed by spray nozzles at the top—our worries melted and reformed into an icy bliss.
Surrounded by the rugged beauty of the San Juan Mountains, I was hooked on the area at the first swing of my ice tool.
Learning How to Ice Climb: Whole New Horizons
I started climbing in the Northeast, clipping bolts at Rumney and placing gear in the Gunks and North Conway. When I discovered ice, it resonated as the authentic mountain style I had read about in books like White Spider and The Mountain of My Fear. It opened my mind, and possibilities.
In the alpine there is no “normal.” Above treeline, storms can transform rock routes into verglas-lined faces and ice-choked cracks in a matter of hours. Climbers need the skills and tools for adapting to rapidly changing conditions.
I have been ten pitches up an ice and steep snow route only to arrive at a crux pitch that required mixed climbing techniques and rock gear for protection. If you’re not prepared, this comes as an unwelcome—and often hazardous—surprise.
Bottom line: adding ice climbing to your repertoire expands your climbing horizons beyond where the summer rock faces end and winter conditions begin.
Want to explore this winter medium? Let’s start by discussing the different types of ice.
Water Ice Climbing vs. Alpine Ice Climbing
The two types of ice climbing—water and alpine—differ according to how the medium is created and the style in which it’s climbed. Water ice is climbed by those looking to test their technique, typically on some sort of frozen waterfall. Alpine ice is climbed in mountaineering pursuits, usually to reach a summit.
Water ice is frozen flowing water
Water ice requires temps cold enough for a period of time long enough for liquid water to freeze as it moves down a cliff. The faster the flow, the longer the temperatures need to be cold.
Water ice formations come in different varieties depending on flow rate, weather conditions, orientation, and elevation. Common water ice formations:
Spray ice features large, rose petal-like ice formations around the base created from the spray of water from higher flow sources.
Cauliflower ice (or jellyfish, as I like to call it) features a large rounded top with a narrow base attaching it to the wall, often forming independent daggers of ice that resemble tentacles.
Eggshell ice forms on lower angle features where snow prevents newly formed ice from bonding and instead creates a fragile lens above it.
Alpine ice is frozen precipitation
Alpine ice is created from the metamorphosis of snow into ice. The two different types are glacial ice, which forms from years of pressure compacting snow, and seasonal alpine ice, which forms from rainfall increasing the speed at which snow transforms into ice.
Steepness determines the grade
While rock climbing is graded on the difficulty of the movement, ice climbing is graded on the route’s steepness. For grading nomenclature, Alpine Ice is denoted with AI and Water Ice with WI, both followed by a numerical grade from 1 to 6 in ascending order of difficulty. The two mediums are rated the same way.
Unlike other disciplines, ice climbing grades fluctuate throughout the season depending on the conditions. A frequently climbed route may feel easier as holds become more obvious from traffic, what we call “picked out.”
Access it all on Colorado’s Western Slope—and elsewhere too
I’ve explored some of the most reputable climbing destinations around the world but ultimately settled in Ridgway, Colorado. Coming from the crowded Front Range, this rural community, ten minutes from world-class ice climbing in Ouray and the San Juans, is a sanctuary where I can guide daily through the winter and return home in the evenings.

Ouray isn’t the only place where you’ll find epic ice, though. Canmore is the heart of Canadian Rockies climbing—both rock and ice—and is a day trip away from classic and remote zones like the North Ghost. Its northern latitude makes for a longer ice climbing season than many places around the world.
The South Fork of the Shoshone River, outside of Cody, Wyoming offers steep winding canyons with massive ice flows tucked into nooks and crannies. Its relatively low avalanche hazard and lack of crowds makes for an appealing ice climbing destination.
Rjukan, Norway should be on any serious ice climber’s tick list. This Northern European destination boasts easy and reliable access to routes of all difficulties. It also has great skiing nearby if you’re looking for a multi-sport trip!
We’ve talked about the medium and some of the best places to play on, now let’s talk about how to get started in this sport that is sure to get you hooked.
What Gear Do You Need to Go Ice Climbing?
Ice climbing is a gear intensive outdoor sport where climbers use crampons on their feet and tools in their hands to grab onto the ice. Mountaineering equipment differs from what you need for water ice climbing but involves similarly basic tools.
The first time I ice climbed was with my college outdoor club in the Adirondacks. I was outfitted with stiff plastic mountaineering boots, cookie cutter style Foot Fang crampons and “modern” ice climbing tools that had a slightly bent shaft but still required a leash. Ice climbing tools have come a long way since then, but they still serve the same purpose.
The Need to Have Ice Climbing Gear List:
Crampons: Spiked extensions of your feet
Even the grippiest of mountaineering boots lose traction on ice. That’s where crampons come in; they are metal-spiked tools that attach to the bottom of your boots, designed to bite into the ice.
Mountaineering crampons have two horizontal frontpoints which allows for better flotation in the snow, ideal when you’re climbing moderate alpine ice in mixed mountain terrain. For water ice climbing, you’ll want reinforced steel vertical frontpoints. Vertically-oriented frontpoints provide better stability and bite when kicking into the ice.
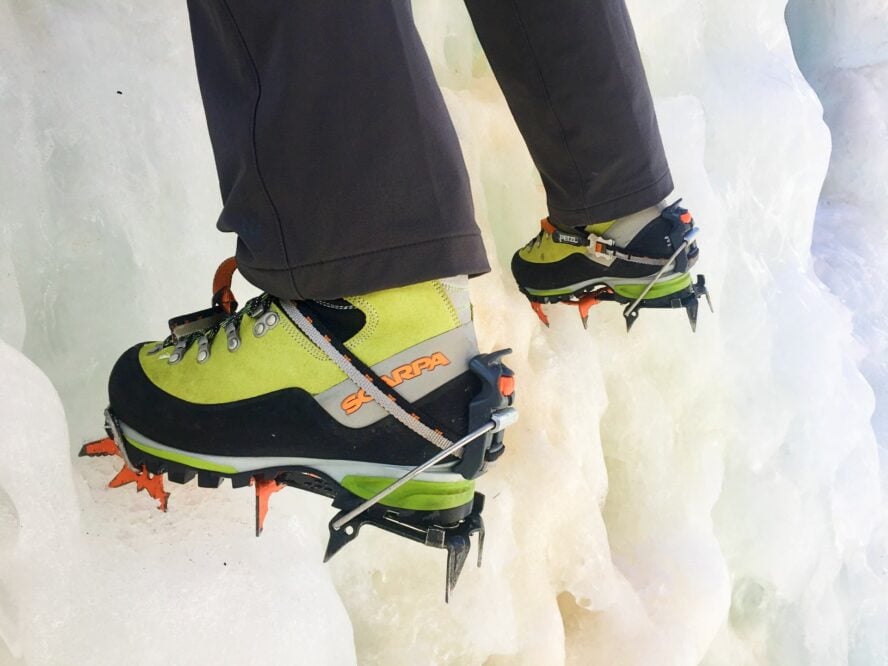
Crampons with two frontpoints are known as dualpoint crampons as opposed to monopoint crampons, which have, naturally, single points at the front. Monopoint crampons are lighter and designed for advanced climbers or those who will be mixed climbing. For versatility, most crampons let you change out the frontpoints so you can adapt to the terrain you’ll be climbing.
Ice climbing tools
Let’s start by talking about the difference between ice axes and ice tools. An ice axe, or piolet, has a straight shaft used in mountaineering to help with balance and safety. An ice tool is a specialized type of ice axe used for vertical ice climbing. Modern ice tools have a curved shaft with a dedicated handle and a replaceable recurved pick.
An adze is a small shovel in the back of an ice axe used for chopping ice on alpine routes or mountaineering objectives. On water ice routes, it’s unnecessary and can actually pose a hazard (if your tool pops it might be coming straight for your head).
Two types of modern ice tools to choose from: Traditional and aggressive
A traditional ice tool sports a handle in line with the shaft, best for ice climbing in conditions where the climber may also need to use it for ascending steep snow or self-arrest. I use this tool on routes like the North Ridge of Kulshan or Ham and Eggs on the Mooses Tooth.
Aggressive ice tools have an offset handle from the shaft and two grip positions on the handle, which suits it best for steeper routes or mixed climbing. These are my daily driver during the winter season.
While the days of wrist leashes are long gone, keep in mind if you’re climbing a multi-pitch or committing alpine route, you may want to use an elasticized, umbilical-style leash to keep you from dropping your tools, or specialized carabiners that attach to your harness, to hold your tools when not in use.
Ideal ice climbing footwear
Ice climbing boots should be comfortably sized but secure enough over the ankle to keep your heel from lifting. Unlike rock climbing shoes, I size my ice climbing boots about 1/2 size up from my street shoes.
You want your boots to be warm, rigid, and crampon-compatible. The standard is full-shank leather mountaineering boots with a GoreTex membrane and front and rear crampon-compatible welts (like the classic La Sportiva Nepal). Modern options include synthetic boots with integrated overboots, which are lighter and tend to be warmer.
UIAA-certified climbing harness
As long as you can fit it over your layers, your rock climbing harness can double as your ice climbing harness. Ice-climbing specific harnesses are available as an option—they’re less padded and include convenient features like ice clipper slots.
Protect your noggin
If you’re not already using a durable, UIAA-certified helmet for rock climbing, you’ll need one for ice climbing. Knocking ice off when you swing is common, so don’t skimp on head protection.
Keep your rope dry
A dry treated climbing rope is critical for ice climbing, as it ensures your rope doesn’t get saturated in drippy conditions. A wet rope has diminished dynamic properties and may lose up to 30% of its original strength.
“There is no such thing as bad weather, just inappropriate clothing.”
Staying Warm When Ice Climbing: The Ancient Art of Layering
I’m not a particularly warm person, so a capable layering system is critical. I have three objectives: to stay cool while I’m hiking, dry while I’m climbing, and warm while I’m belaying. These contradictory attributes ask a lot of my equipment, so my clothing selection needs to be purposeful. Like the saying goes, “there is no such thing as bad weather, just inappropriate clothing.”
Let’s start with baselayers. These next-to-skin pieces should be sweat-wicking, which will keep convective cooling to a minimum. I save my lightweight baselayers for higher aerobic pursuits or warmer weather sports. For ice climbing, I choose heavyweight top and bottoms, over-the-calf mountaineering socks, and a light fleece hat.
To stay dexterous while I’m climbing, I opt for warm, compact midlayers. A fleece jacket offers a great warmth-to-weight value and an integrated hood allows me to stretch it over my helmet to stay warm on belays. I’m also an advocate for a lightweight vest, which adds warmth—but not bulk—to your core.
Softshell or hardshell?
Staying dry while you’re ice climbing is not always possible—you are climbing a waterfall, after all. Most days I opt for a brushed fleece-lined softshell jacket with durable water resistance treatment (DWR), but my hardshell jacket lives in the bottom of my pack in case the route’s drippy or there’s inclement weather. Because pants tend to stay drier, I climb in a warm, water-resistant softshell pant.
Ski pants are often too baggy and increase the risk of catching your crampons on your pants. If you don’t want to invest in a dedicated pair of ice climbing pants though, I highly recommend pairing your ski pants with gaiters to keep the baggier material tight around your lower leg.
The value of a puffy
When you’re climbing, your body builds up heat and throwing on a big puffy jacket while you’re belaying is the best way to maintain it. I size my puffy a bit larger so it fits over my layers and extends below my hips. Whether you choose down or synthetic insulation depends on personal choice, weather, and intended purpose. Synthetic insulation is bulkier but will keep you warmer in wet conditions, whereas down insulation is warmer and lighter, as long as it stays dry.
Gloves are your most important piece of clothing
When it comes to ice climbing gloves, balancing dexterity and warmth takes experimentation. I bring at least 2-3 pairs of gloves to switch between and store them in a makeshift “furnace pocket” when I’m not wearing them. For climbing, I choose lightly insulated, highly dexterous gloves. For belaying, I wear heavily insulated, durable gloves with a leather palm.
Pro tips for staying warm in winter
Proper clothing is essential, but it’s not the only way to stay warm. You can fuel your body from the inside, too. Bring a thermos of your favorite hot drink—my go-to is the Skratch Labs lemon and lime electrolyte mix—in addition to a healthy mix of fatty and sweet snacks.
When I’m belaying, I loosen my boot laces to encourage more wiggle room in the toe box and cross my legs, pushing the femoral arteries together to trap the heat between my thighs. I also recommend light exercises, such as air squats or arm rotations, to keep the blood flowing to the extremities.
How to Get Started Ice Climbing
Rock climbing is great preparation for ice climbing because body mechanics and technical climbing skills crossover. But, you don’t need to be a rock climber to ice climb. In either case, training sport-specific strengths on the ground is an effective way for anyone to prepare for ice climbing.
You can improve your grip strength by attaching weight to ice tools and walking with them by your side, called a “farmers carry”, and by performing ice tool hangs (think fingerboard training with your tools). My favorite pre-season strength training exercise is an inclined row to a one arm lock off. If you need help coming up with a training plan, Uphill Athlete offers great coaching and affordable, sport-specific options.
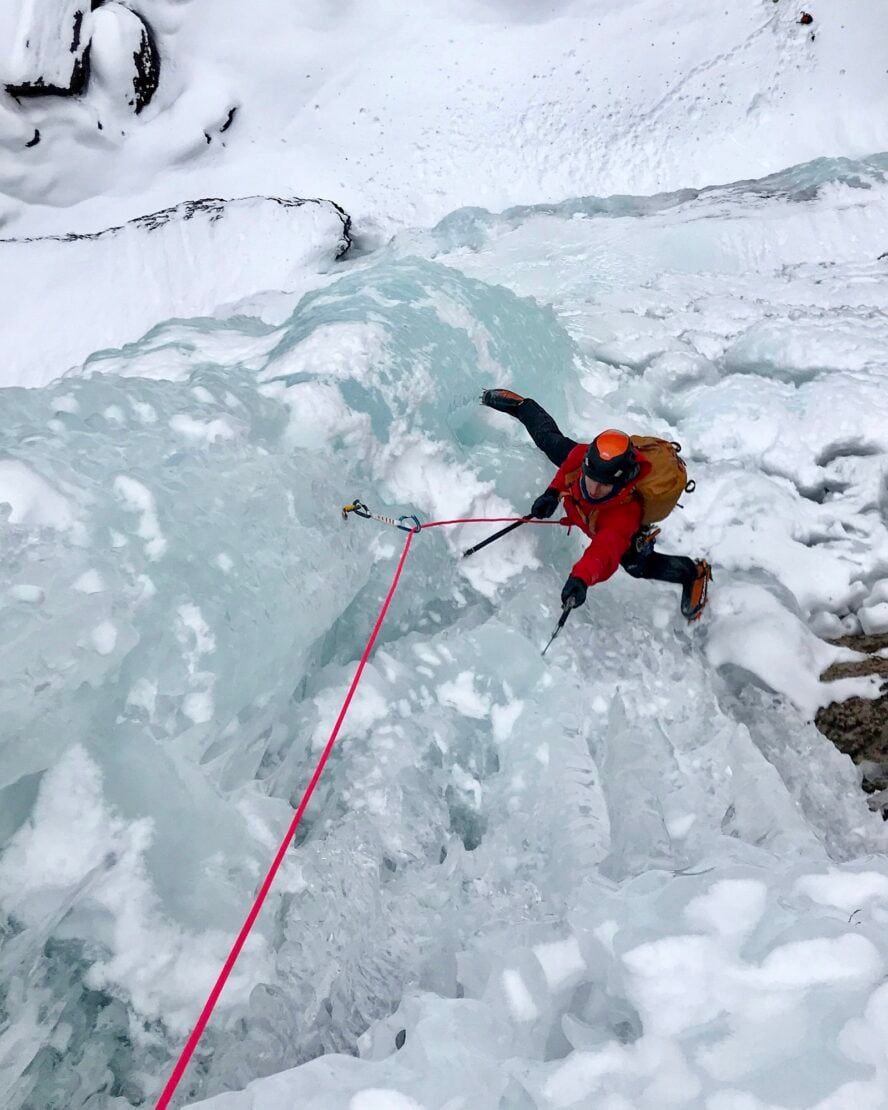
It’s all in the swing (of an ice tool)
Ice climbing requires rhythmic and repetitive movement. The basic swinging position is from a tripod stance with your feet on the same horizontal plane and glutes pushing your pelvis into the wall. This creates a stable base for generating power.
For each successful swing, you will kick a few times, working your feet up while you stagger your tool placements. The kicking motion pulls your hips back from the wall and requires you to keep your chest forward so you can see where to place your feet. It’s important to keep your toes level and prevent the natural inclination to drop your toes (you want to feel the muscles next to your shin engage). Petzl put together this helpful video on the fundamentals of ice climbing movement.
Consider hiring a climbing guide
Customized instruction from a guide is the fastest and safest way to learn how to ice climb. A guide will help you develop efficient technique while supporting your individual goals—whether you want to learn how to ice climb or you’re a seasoned climber looking to improve your skills.
I started guiding in 2006 because I saw it as an opportunity to get paid to climb. But, I quickly learned that helping people develop their climbing techniques required setting aside my personal objectives. To become the best guide I could, I went through the American Mountain Guides Association (AMGA) training and certification program.
Guiding has since transformed my passion for climbing into a selfless endeavor. I’ve come to truly appreciate helping people achieve euphoria on remote alpine peaks, master new skills during a climbing course, and tick their dream routes.
Keep costs low: Tips from a pro
As I guide, I’m aware the cost of equipment and instruction can be a barrier to entry. Consider booking a group course with a guide service, as these are typically offered at discounted rates. Also, many guide services and climbing gear shops, like Ouray Mountain Sports, provide rental ice climbing gear. Thirdly, consider checking attending clinics at ice climbing festivals. Here are a few offered in the United States each winter:
- All In Ice Fest
- Bozeman Ice Fest
- Michigan Ice Fest
- Mount Washington Valley Ice Fest
- Ouray Ice Fest
- Valdez Ice Fest
To get the best bang for your buck when you’re spending money on a clinic, course, or guided trip, be sure to ask about your guide’s qualifications: What is their level of AMGA certification? What is their guiding and instructing background? What’s their personal climbing experience? If the guide service can’t answer these basic questions, consider spending your money elsewhere.
Still Have Questions About Ice Climbing?
Some ways to learn more
While there’s no substitute for customized instruction from a qualified guide, you can learn a lot from books, online resources, and other climbers. For one, Falcon Guides published a useful manual, How To Ice Climb!
Climbing with experienced friends or a mentor is another affordable and fun way to get into the sport. When you’re learning, make sure to ask lots of questions and pay attention to the whole process. If you don’t feel safe or understand something, speak up.
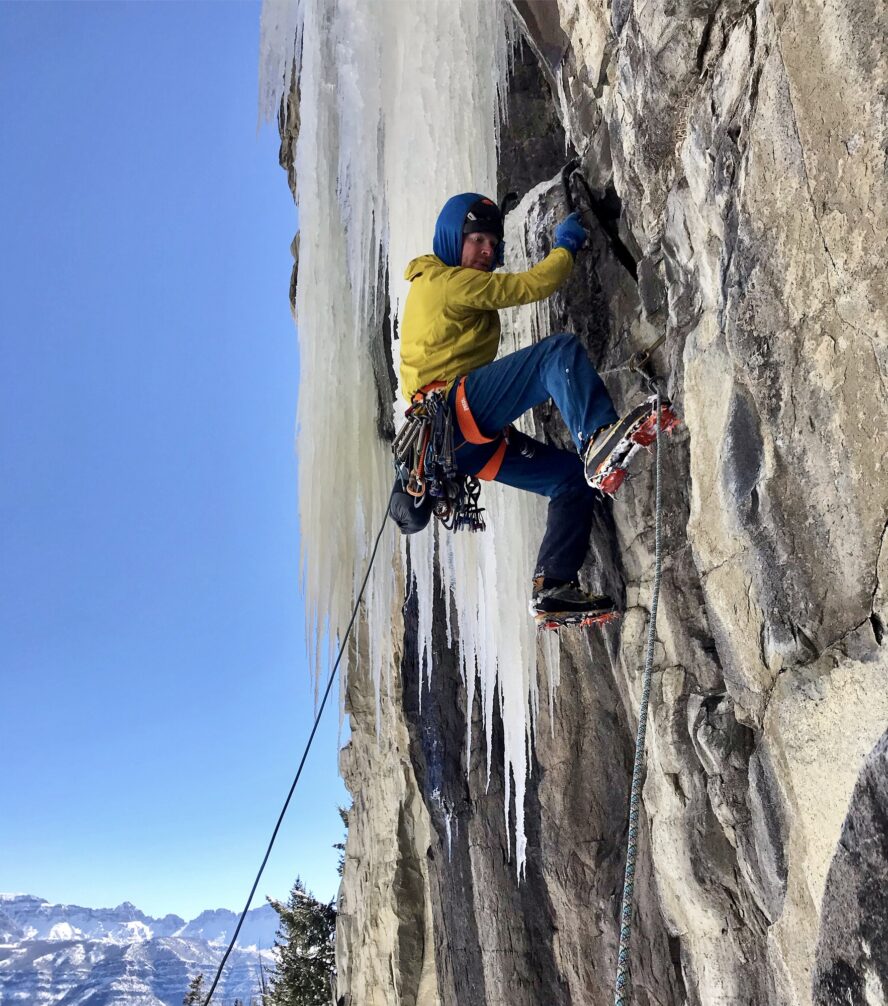
Mixed climbing and dry tooling: What’s this?
Drytooling is a highly athletic sport where climbers use ice tools and crampons to ascend rock, rather than their bare hands. Ice tools allow climbers to hook into small pockets and narrow edges otherwise too difficult to grasp.
Mixed climbing combines the delicacy of ice climbing with the power of drytooling, where climbers transition between rock and ice on the same route.
It is possible to drytool with the exact same equipment used for ice climbing, but many committed climbers choose to use a more aggressively angled tool with a thicker pick for increased durability. If you’re a strong sport climber used to steep, overhanging terrain, drytooling may be right up your alley.
How to stay safe while you’re ice climbing
In the mountains, hazards are inevitable. The mantra “slow down to go fast” applies here. Loose rock can shift during warm daytime temperatures and snowpack is prone to avalanching in storm cycles.
One inevitable hazard that sets ice climbing apart from rock climbing is falling ice—as you swing and kick, chunks will break off. For this reason, it’s standard practice to shout “ice” warnings only when larger chunks fall or there’s a climber in the line of fire. With that said, be especially mindful of your positioning on the ground, and always stand far back or to the side of a route with a climber above.
Many routes feature ice caves or protected alcoves that are useful for sheltering belays. Also, consider a ground anchor to keep your belayer from being pulled towards the falling ice.
Modern climbing gear is designed to be durable, but when you’re ice climbing it’s especially important to regularly inspect your “soft gear”, including ropes and slings. The sharp points on ice climbing tools can fray or coreshot your gear. Keep in mind soft goods have a 5-10 year life depending on how often you use them.
When is the best season for ice climbing?
Ice climbing season in the northern hemisphere runs from mid-December to mid-March. At higher elevations and destinations further north, some routes come into season as early as mid-September. Especially with climate change, ice conditions can morph in a short period of time, so it’s important to be mindful of a route’s solar aspect and temperature fluctuations. Throughout the winter, I habitually check overnight low temperatures, as consecutive nights above freezing can result in delaminating ice.
What is ice climbing, really? Only the best time of the year
In autumn when the desert rats start flocking to Indian Creek to shove their mits into cracks, you can find me above the treeline searching mountain drainages for frozen drips. A ritual I call “taking the tools for a walk,” these journeys are full of anticipation. Sometimes I just get my boots muddy, but other times, I’m rewarded with that ephemeral frozen drip—the telltale sign ice climbing season is here!
Want to give ice climbing a try? Develop your swinging and kicking techniques on a guided ice climbing tour in Ouray with Micah!