
To transition your skills off resort groomers and onto untouched powder beyond the ropes, there are a few things you need to know. As a beginner, you may find yourself lost when trying to decide which avy course to take first, what gear is worth investing in, how to plan your first trip and figuring out exactly what skins do. You should see these backcountry skiing tips as just the tip of the iceberg — an intro into the steps you need to take to carve your first backcountry tracks.

What is Backcountry Skiing?
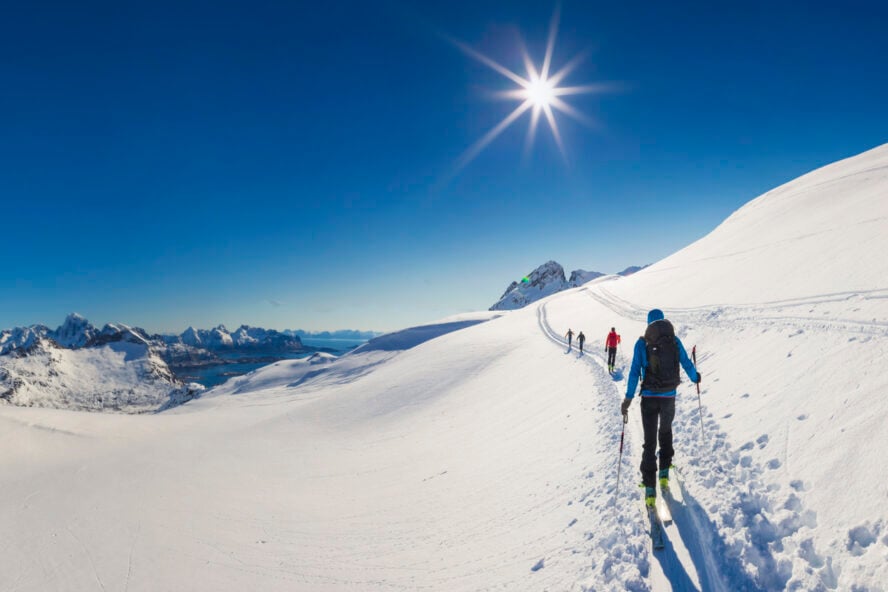
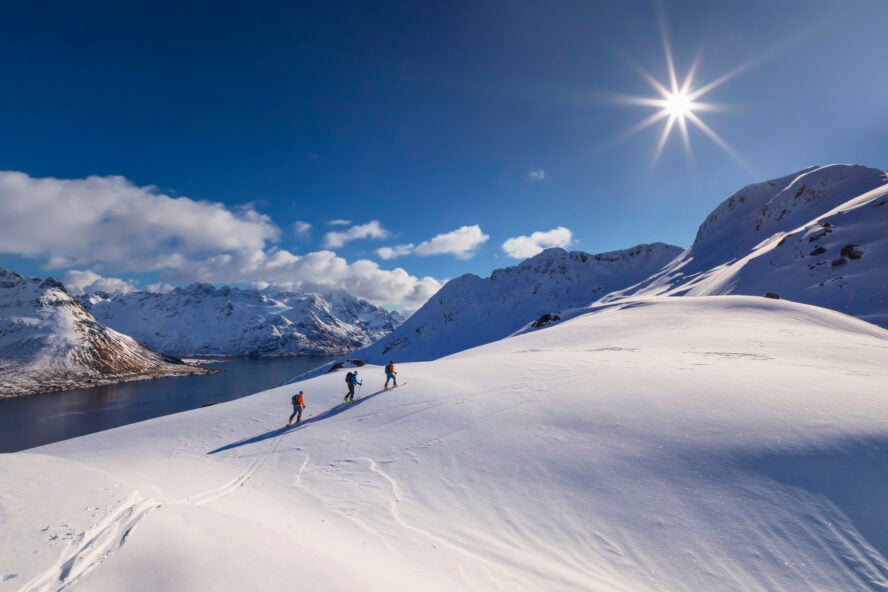
Backcountry skiing takes place outside the ski-patrolled zone. This can be deep in the backcountry or just outside a ski resort’s boundaries. American backcountry is more obvious and, if you’re heading out-of-bounds off the resort or into a closed area of the ski hill (not allowed and not a good idea!)It’s often separated by a fence.
In Europe, as soon as you slide off the marked ski run, you’ve ventured off-piste, meaning “off-track.” Once you’re off-piste, you’re on your own. Whether you refer to it as backcountry or off-piste, either way, you’re responsible for your own safety and well-being.
Sidecountry vs. Slackcountry: What’s the Difference?
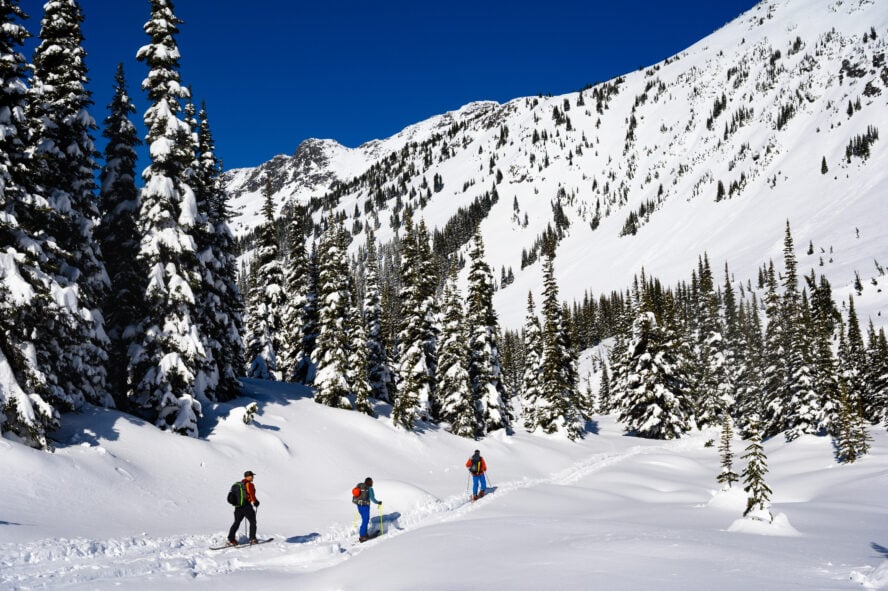
The minute you’re skiing out of marked or controlled areas, it’s considered backcountry. But what does “sidecountry” or “slackcountry” refer to? This signifies backcountry skiing that is easily accessed from a ski resort or road access. As opposed to “‘pure” backcountry skiing that uses skins and is entirely reliant on human power to travel around, slackcountry skiing often uses ski-lifts to gain access to the backcountry.
Slackcountry saves you a lot of skinning or uphill traversing that can tire you out, but backcountry far from resorts tends to be the more adventurous option. But that’s not to say that you can’t access amazing backcountry skiing just off the resort — in fact, it’s a great way to get started and build your skills.
How to Start Backcountry Skiing: 9 Backcountry Skiing Tips
Now that you know what backcountry skiing really is, it’s time to see if you’re ready to take the plunge. First of all, to start backcountry skiing, you have to be an experienced resort skier. You have to have the right gear and appropriate avalanche training in the backcountry.
For your first season, focus on properly identifying what is — and isn’t — avalanche terrain. Buy trusty guide books, learn how to recognize steep slopes and navigate a map. Before venturing out to ski, start to incorporate checking an avalanche bulletin in your daily routine.
The list of things you need to do before your first backcountry adventure can seem overwhelming, but here’s an overview that will have you checking the items off in no time.
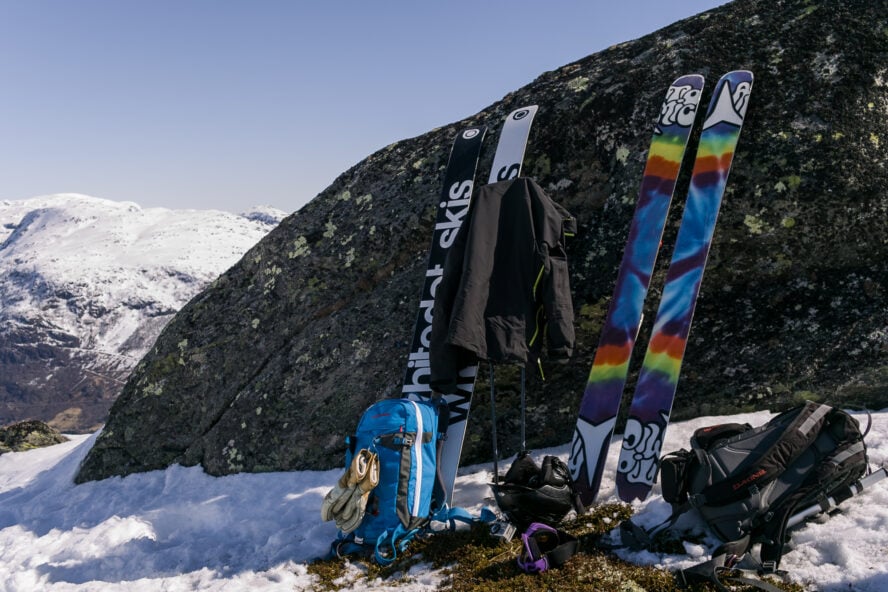
The first step — get familiar with your gear
We’ll get into gear details in a minute, but if you’re new to backcountry skiing, the first tip is to get familiar with your gear. Taking your fresh gear out without any practice at home will only cause you problems in the field.
For instance, learn how your boots, bindings and skins work. Get comfortable with taking your skins on and off, switching from ski mode to walk mode, and look over your gear and learn how to fix it in the event something goes sideways while you’re out skiing.
Focus on avy education
How to get into backcountry skiing? Your first step should be avalanche education.
Most folks start their avalanche education with an awareness course. It’s usually a chit-chatty, hour-long program set in gear shops that will point you in the right direction. A formalized Level 1 avalanche course takes 24 hours to complete, with at least half of those hours spent in the field. It covers an overview of identifying the terrain, gives you an introduction on bulletins and how to implement that information in real life, as well as other safety basics.
An additional must-do course is an 8-hour rescue course that’s focused on learning how to use your beacon, shovel and probe correctly in a rescue response. A Level 2 course takes you out in the field with an instructor and small team and also lasts 24 hours. There are locations, like the Kootenays, for instance, where you can opt for a hut-based Level 2, spending four to seven days skiing in the backcountry.
In Canada, the USA and New Zealand, avalanche education has a more established approach when compared to Europe, where it differs from country to country. The mountain clubs in Italy, Austria and Germany will often offer introductory avalanche courses, in addition to alpine climbing and crevasse rescue courses. There isn’t a universal course to take, but mountain clubs are the place to start.
Define and maintain your safety process
Before you go skiing, you need to have a clearly defined safety process and you need to maintain that process in the field. While it’s very tempting to just jump on your skis and head to iconic routes, such as La Vallée Blanche in Chamonix, preparation is always mandatory off-piste. Get in sync with your touring partners on what that process looks like and be on the same page about risk management. Know your gear before heading out and have first-aid and repair kits packed and easily accessible. It doesn’t matter whether you’re new or an avid skier, everyone needs to have a plan in place and they need to follow it.
Learn to manage your psych level and motivations
Backcountry skiing is a rush but you need to keep your cool to mitigate as many risks as possible. Extensive preparation and research, as well as spending time in the mountains will make you feel more secure in your abilities. As for motivation, there are many articles to read to get you hyped and countless groups on social media where you can find like-minded enthusiasts.
Book a guide for your first trip
If it’s your first time in the backcountry, play it safe. Take some backcountry ski lessons or gather a few ski buddies and pitch in for a guide. Having someone who knows the terrain, has loads of experience under their belt and has taken countless courses to keep you safe in the mountains really pays off in the long run. Not only will you feel more comfortable, they’ll be able to correct and suggest techniques for optimal performance.
How to get into shape for backcountry skiing?
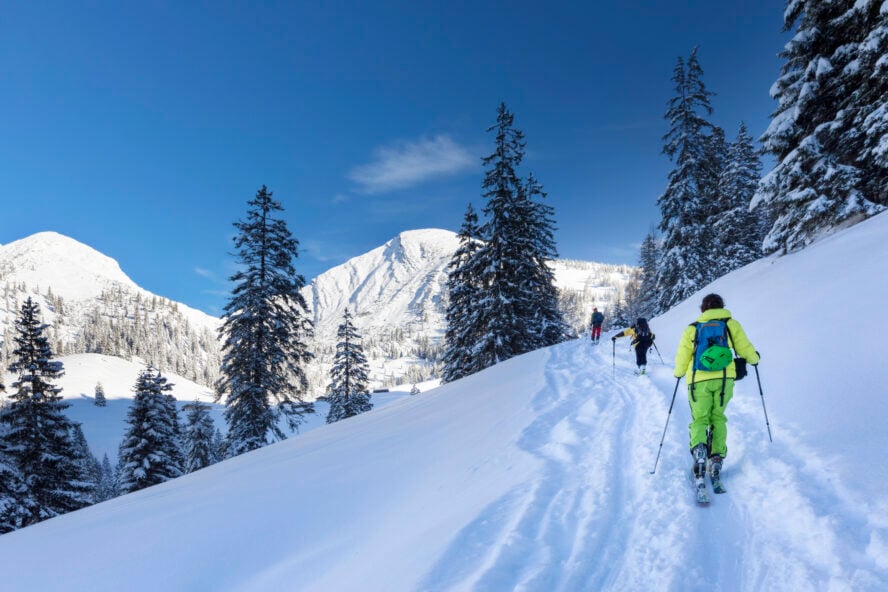
If you can hike for three hours and are somewhere in the range of a strong intermediate to advanced skier, skiing black diamonds in resorts, you can start planning your first backcountry trip. If you’re an intermediate at the resorts, but have the stamina for a long day out, going out with a guide your first time will help immensely.
Skiing variable snow and staying on your feet the entire time probably won’t happen your first time out of the gate, but you’re in for a good time either way. Your first time uphill is going to be tiring, you’ll carry a lot of weight on your feet and your back that you’re not used to at the hill, so make sure to pick a mellow place to get the hang of it before tackling bigger objectives.
Pick the right ski touring partner
Partners will make or break your trip. Link up with someone who has a similar pace to yours, fitness level, risk tolerance, and preferably, more experience than you. If your touring partner boasts with campfire stories of escaping avalanches, near misses and lost skis, you should probably reconsider. They’re probably a great person, but maybe not the partner you’re looking for.
The characteristics of an ideal ski partner is someone who’s reliable, communicates easily, is someone you can work with, and of course, someone you’ll have fun with! Once you’ve gathered your posse, start listing medical and repair kit needs specific to your group. Have you checked the bulletin yet? Check it again just in case and make sure to avoid avalanche terrain.
Looking to learn more about backcountry skiing? Read up
Doug Litmer is an avalanche professional from Canada and his e-book, Avalanche! The Guide’s Guide to Safer Travel in the Mountains is a really cool interactive book with a ton of videos and useful backcountry skiing tips.
Another must-read for anyone trying to understand the physics of snow is Backcountry Avalanche Awareness written by Bruce Jamieson, one of the foremost snow science academics on the planet.
Staying Alive in Avalanche Terrain, by Bruce Temper, who used to run an avalanche center in Utah, is probably the most widely read avalanche book in the USA and something every new backcountry skier should check out.
While you’re still learning what backcountry skiing even is, I would recommend sticking to trusted publications. Anyone can post online and you need to be discerning. One trusted online source you can look up is Wil Rickard’s blog, Where the Fruit is. He’s an outdoor educator and an avid backcountry skier, so it’s safe to say he’s qualified.
Before you read about gear and avalanche safety, check out the 57hours Adventure Talk on Backcountry Skiing Safety for Beginners on the 57hours YouTube channel:
Essential Backcountry Skiing Gear for Beginners
How to start backcountry skiing if you don’t have a fortune to spend on gear? Don’t worry, it’s less expensive than you think. Many backcountry first-timers make the mistake of spending too much money on equipment they simply don’t need.
You don’t need top-of-the-line touring gear your first season out (this is where buying second-hand will give you a good bang for your buck), but there are a few items that are worth investing in. Here’s a breakdown of the basic gear you need to go backcountry skiing:
How to choose the right skis to start backcountry skiing
Backcountry skis need to do two things: get you uphill efficiently and have enough power to make skiing downhill through powder and variable terrain fun. Backcountry skis are mostly the same as your regular downhill skis, but with a few slight differences.The right skis for you depend on the job you want them to do. Ask yourself what you plan to use them for and what your priorities are, because there are trade offs to be made.
For long days and ski mountaineering, you’ll want something light, but then you’ll be trading off on power.
For easier skinning uphill, you’ll also want something light, but again, you’ll be trading off power and comfort on the descent.
If you want to plow through deep powder with minimal skinning uphill, you’ll want to go for a slightly heavier, wider ski.
And if you want them to work both in the backcountry and on resort groomers, you’ll want to look into hybrid models. It’s all a give and take.
Backcountry ski weight
The most significant difference between touring skis and downhill skis is their weight, which is determined by their construction and materials. Depending on what they’re made from, what the core materials are, and what other design features they might have to reduce materials used, will all play a factor in how light they are.
Then you have the length and width; that’s also going to determine weight. You’ll want to have your backcountry skis hit that sweet spot where they’re not heavy, but not too narrow or light. This prevents bending and skiing “twitchy,” yet allows for effortless gliding through soft snow.
Camber, rocker and early rise decoded
When picking out your first pair of backcountry skis, you’ll come across the terms “rocker” and “camber.” These terms are referring to the design profile of the ski, in particular, the curvature. It’s easy to picture if you think of a ski laying flat on a surface.
Traditional camber is convex in design — contact with the ground is made at the tip and tail sections of the ski, with the center of the ski arching slightly upwards. With this ski shape, you have a longer effective edge (the length of the edge in contact with the snow while making a turn). This traditional shape adds to stability and control while skiing.
“Rocker,” also known as “early rise,” simply refers to how much a ski turns “up” at the tip and tail — the opposite of what a traditionally cambered ski does.
Picture the bottom of a boat. This makes skis more forgiving in variable and deep snow. Rocker in the tip increases float, making powering through variable conditions easier. Rocker in the tail helps with navigating technical sections.
The profile of most backcountry skis today have a combination of both camber and rocker. How much rocker and camber you want in your skis depends again on what you plan to do with them.
For new backcountry skiers, skis with a cambered center and an early rise in the tip are a solid overall choice for most conditions.
You can likely get by with used skis for the first few seasons. The reality of the backcountry is that you’re going to hit rocks and roots that will ding up your skis. Don’t feel like you need to spend a fortune on a pair of custom skis as soon as you step onto the mountain. When you feel you have a sense of what kind of skis you like, then commit.
How to choose the right bindings to get into backcountry skiing
Once you get the perfect pair of skis, you’ll have to put a binding on it. There are three main types of bindings: tech bindings, frame bindings and hybrid bindings.
Tech bindings have been the go-to choice for many backcountry skiers because they’re super light weight and how they transition from ski to walk mode seamlessly.
Frame bindings are the traditional style mounted to a frame (which is bolted to your ski) that releases at the heel for skinning. They’re often heavier, a little more bulky and less efficient for climbing, but they most closely conform to the standard bindings you’ll use at the resort.
Then, there’s the hybrid option that combines features of both for durable and easy-to-skin in bindings. So, what pair should you get for your first foray into the backcountry?
Tech bindings, the lightweight choice
Tech bindings are designed specifically for alpine touring and are great for backcountry skiing because of their weight (a good pair should weigh around 300 grams). They have two sets of pins that hold the toe and heel in place and are designed to fit with alpine touring ski boots that have the matching “inserts.”
The original tech bindings were made by the company Dynafit and are referred to by many as “dynafiddles.” As soon as you try to get the pins into the toe inserts on your boots, you’ll understand why. The toes of the boots have a built-in insert that the pins snap into and attaching them takes some getting used to. Practice stepping in and out of them in your living room.
The main advantage of tech bindings is that they allow your heel to come up while touring, but they still ski downhill really well. They are light, efficient and easy, once you get used to them. You’ll find them less robust than alpine bindings. In addition to weighing less, tech bindings come with or without brakes, meaning you can get away without using a leash to prevent losing your skis. G3, Black Diamond, Plum, ATK, Salomon and Marker are all good brands.
Frame bindings, the durable, classic option
Frame bindings closely resemble classic alpine bindings, but the heel has the ability to to release from the rails. In walk mode, the boots stay locked into the bindings, but the whole binding pivots at the toe. The trade off is that they are more durable, but they weigh significantly more than tech bindings.
Because they’re close to the bindings you might be used to, most new backcountry skiers find they’re easy to get the hang of. But, because of their weight and the lack of range of motion of your foot, they can start to feel quite strenuous over the course of a whole day. For aggressive skiers though, they may be the best bet.
Hybrid bindings combine functionality with durability
Hybrid bindings combine the design of tech and frame bindings. They have the pins on the toe like a tech binding, but a more traditional heel. So, you get that easy walkability of the tech option, but your heel is more like an alpine binding. The toe has pins on it, but overall a hybrid binding is more robust than a tech binding.
If you think you’re going to spend most of your time in the ski area but want the option of going ski touring, hybrid bindings will suit you better. They will last you longer, you don’t have to baby them as much.
Most hybrid bindings also come with a built-in mechanism that gives you more release, making them potentially safer for your knees. When you need to walk, you keep the toe attached and stride forward with your boot pivoted up, as you tour. If you’re climbing a steep hill, there is a metal plate called a heel riser that can make it far less straining for your calves. Once you need your binding to shift into ski mode, all you have to do is shift the heel into “ski mode,” step in, and you’re ready to ski. On the descent, you may feel more confident knowing with a slightly more robust binding.
Do you need a leash?
Ski hills generally have a rule — you either need a brake or a leash on your skis. A leash is a short cord that attaches your skis to your boot. You’ll often see folks skiing in the backcountry with a tech binding, sans the brake or a leash. It’s your prerogative, but keep in mind your ski can slide down the mountain, leaving you behind. Having a retention system gives me a sense of security.
Invest in a good pair of touring boots
If you’re going to spend cash on anything, spend it on boots. If you’re a heavier, more aggressive skier, then consider a slightly heavier boot — 1500g and up — to match your skiing style. If you’re skinning for fitness, a lighter skier (less than 170 lbs), you can get away with an 1000g boot.
As AT boots are lighter, consider investing in replaceable, field-serviceable hardware, as well as a repair kit. Since the boots are a crucial piece of equipment, put some time into getting the right pair for you and then know how to field-repair them. If you need extra support or warmth, you can buy heat-moldable liners that a boot fitter can mold to your feet.
A good boot is going to be stiff, but give you enough mobility to flex forward as you climb uphill. No matter your objective and the touring boots you opt for, make sure they provide enough warmth and comfort. Don’t go for the fanciest option at the shop, make sure they feel really good on your foot.
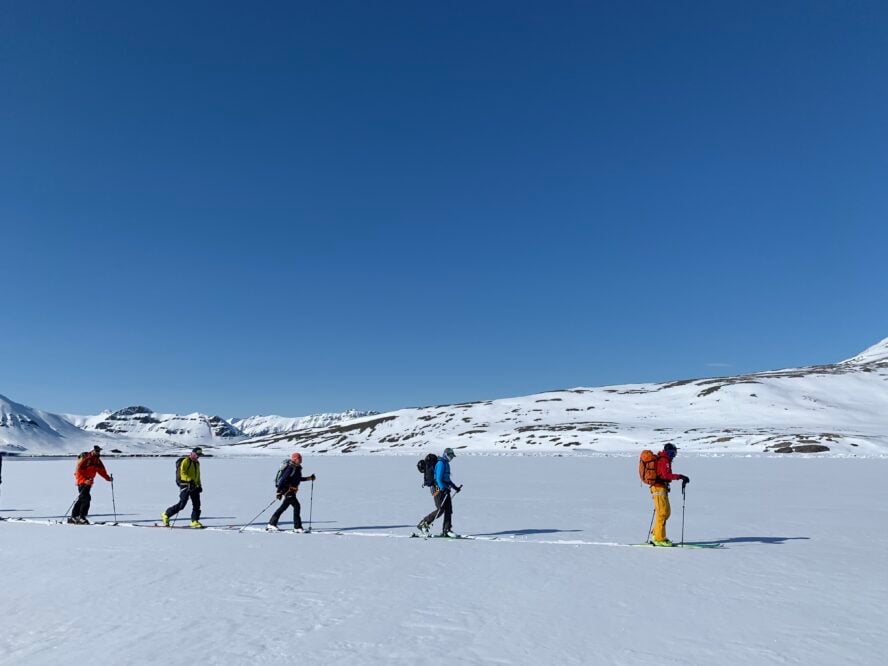
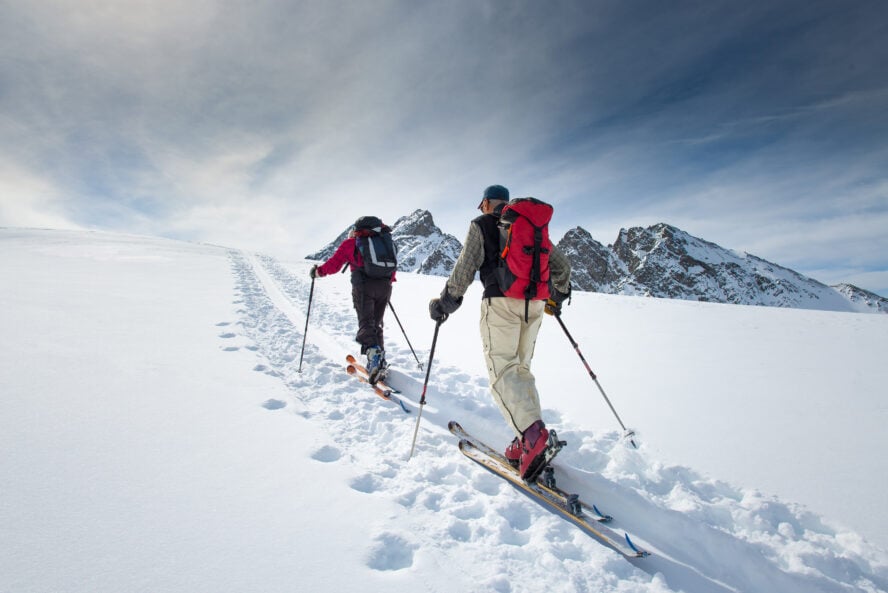
Climbing Skins Make Uphill Travel Possible
You may have heard the term “skinning,” while learning how to backcountry ski. Skinning is the act of skiing uphill, and it’s made easier by using something called “skins,” which are an essential part of any backcountry touring setup.
Climbing skins are thin strips of material that fix to the underside of touring skis to help make going uphill possible and prevent sliding backwards. They’ve been used for about as long as people have been skiing.
Originally made of seal skin, they’re now made out of mohair, nylon or a blend of the two. When going uphill, the hairs on the bottom of the skins lay flat, making gliding across the snow easy. If you start to slide back, the hairs stick up, gripping the snow and providing traction.
On the underside of the skins is a gummy glue used to adhere to the bottom of your skis. It’s a pretty straightforward affair; you put them on when going uphill and peel them off at the top. On a cold day, fold them in half (glue side to glue side) and wrap them under your jacket to keep the glue happy and pliable.
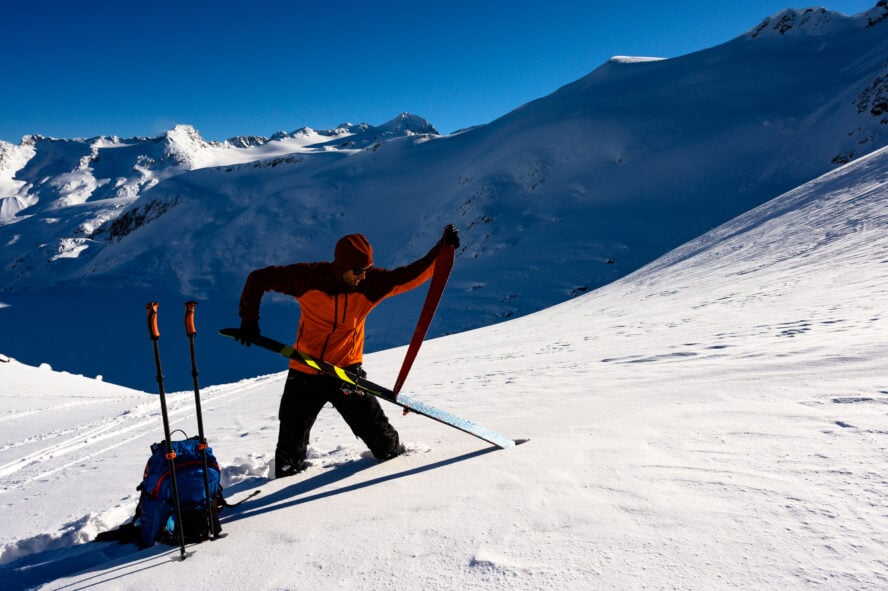
Storing your skins properly makes all the difference. It doesn’t matter what type of skins you have, synthetic or mohair, but once you’re done for the day, they need to be hung in a dry, warm room. If you’re not going to use them for a while, store them with a piece of plastic in between. This will make them last for a few seasons, at least. And whatever you do, with traditional glue skins–avoid getting the glue dirty with pine needles, dirt, etc.
What Backpack Should You Get for Backcountry Skiing?
Once you have all your gear, you’ll need a backpack to carry it in. The most important thing when picking the right ski touring backpack for you is that it fits you well, and it has at least two pockets to store your essential backcountry items.
When picking the right one for you, don’t assume they will all fit you. You will want to try it on first before purchasing to make sure it feels good on your back. Then, once you’ve found the right fit, make sure the compartments are easy to access while you’re on-the-go and there’s enough space to carry what you need.
For instance, if you tend to run cold, make sure you’ve got enough space for an extra puffy jacket and things like that.
Avalanche Gear Will Save Your Life
The holy trinity of avalanche gear are the beacon, shovel and probe. It’s not enough to own these pieces of equipment, you also need to know how to use them. Regular practice is essential.
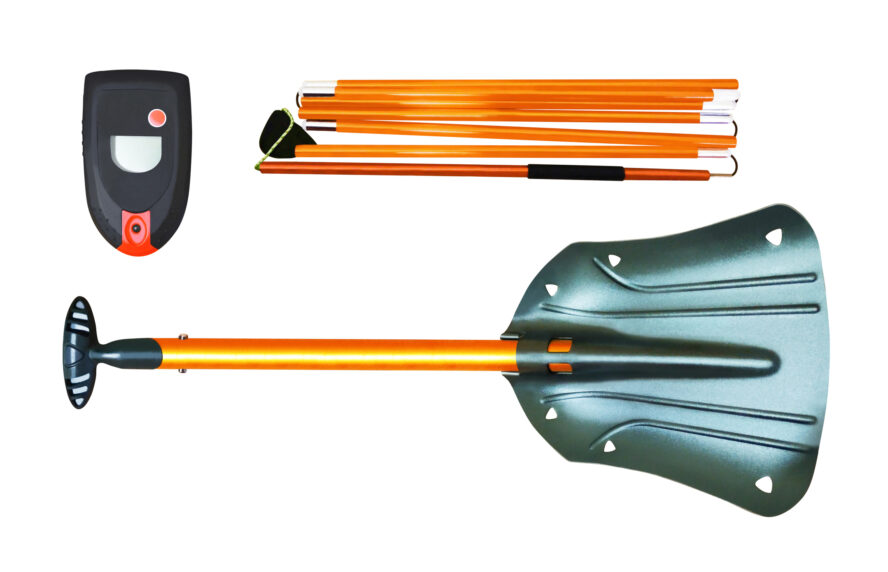
The avalanche beacon: The avalanche beacon, also called an avalanche transceiver, is a small device worn close to the body that emits a radio signal that can be picked up by other beacons in the area. In the event that someone is buried, ski partners will switch theirs to “search” mode to pinpoint the person and then use their probe to figure out where to start digging.
All beacons operate on the same frequency, so it doesn’t matter which brands or model you get — they all work together. If you’re going to backcountry ski with any frequency, this is one piece of equipment you need to buy for yourself — don’t rent.
What’s the best beacon out there? The one with which you’re the fastest. A premium beacon with advanced features is no good if you don’t know how to use it. Do your research, borrow different models from friends, get a feel for them in your hand and then practice, practice, practice.There are beacon parks with buried transceivers that you can visit to put your skills to the test.
When you have your beacon, treat it like an expensive smartphone. Before you head into the backcountry, make sure you understand how the search function, marking and trailhead check work, and which batteries you need for your beacon.
The shovel: The most important thing to consider when choosing a shovel is what it’s made of. Steer clear of plastic or carbon-fiber shovels. They can break when digging through avalanche debris and that’s something you can’t happen in a life or death situation. Buy one with a steel or aluminum blade and with an extendable telescopic handle. Shovels are a big part of avalanche rescue, so make sure yours is sturdy and reliable.
The probe: An avalanche probe is a long, collapsible pole that is used to help locate a person buried under the snow. After you’ve located the person using your beacon, you use the probe to pinpoint their location before you start digging. They work like a tent pole that you unfurl and tighten. When buying your probe, make sure that it is at least 260 cm minimum and get one made out of aluminum. Later you can consider a lighter, carbon probe.
Get Used to Using Your Touring Setup
Before you head out into the backcountry for the first time with your new setup, get familiar and comfortable with everything. Practice at home first. Pack and unpack your backpack, practice putting your skins on and off your skis, and get used to using your boots with your bindings. And when it comes to your avalanche gear, practice, practice, and practice some more.
One of the coolest developments over the last decade is that some ski areas now allow uphill access or uphill travel. The easiest way to get used to your gear is heading to the ski hill and getting in a couple of laps up and down.
Being in controlled terrain really lets you get a hang of switching between walk and ski mode, as well as getting a feel for your bindings. As a beginner backcountry skier, you don’t want to end up in a situation where you’re unfamiliar with using your gear as that could lead to dangerous consequences.
How to Identify Avalanche Terrain When Backcountry Skiing
What comes next is not a replacement for proper avalanche training. If you plan to go into the backcountry unguided, you need to know how to identify avalanche terrain, mitigate the associated risks, and know how to properly use your avalanche gear. That said, here are some things that every new beginner backcountry skier should know.
Learn to Identify Avalanche-Prone Terrain
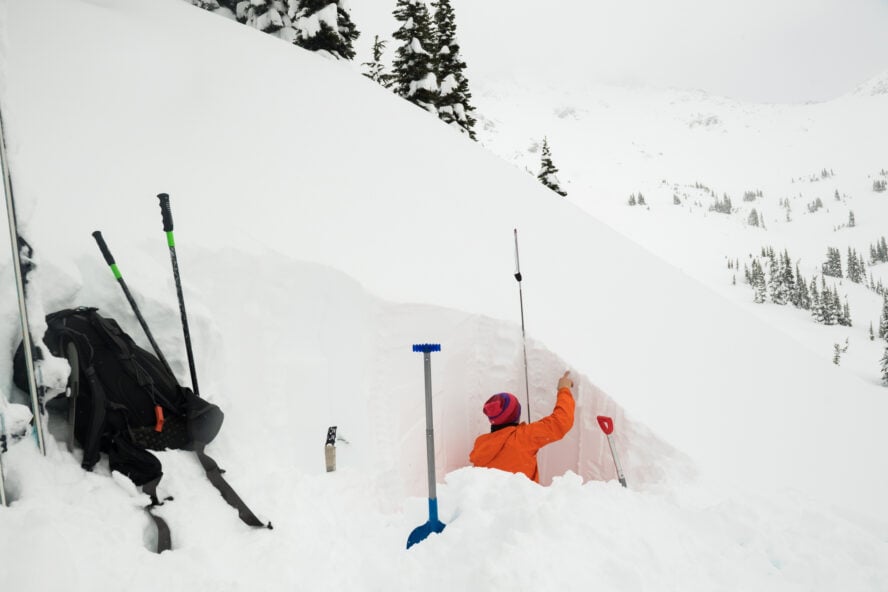
Skiing in avalanche terrain requires extensive training and preparation. Before you decide on where you’re going to head out skiing, the step is to figure out if your destination is avalanche-prone.
When looking for great snow, you can’t just turn your brain off and go for it. Even the best backcountry skiers can get caught in an avalanche if they’re not careful. If you just decide to ride it out, it could have fatal consequences. There is plenty of amazing powder out there, and you don’t have to take crazy risks to get it.
Backcountry does present more risk than resort skiing, but if you’re smart, you can mitigate much of the hazard.
How to Steer Clear of Avalanches
Simply put, you can’t get killed by an avalanche if you’re not in avalanche terrain. For your first season of exploring the backcountry, stick to easy-to-manage terrain that’s not on slopes steep enough to avalanche, nor below slopes steep enough to slide. Check the daily bulletins to get a sense of the avalanche hazard. Read the avalanche bulletin closely and avoid the terrain it describes as hazardous on the day!
The best way to remove the avalanche hazard from your life completely is skiing on slopes that don’t go over 25 degrees and aren’t connected to slopes higher than that. Once you gather some experience you’ll be able to measure slope steepness as soon as you see it, but for now, use a clinometer app on your smartphone. You can get a decent idea of slope angle, without being on the slope in question. So, try to measure slope angle from the side, in a safe, non-exposed position.
Don’t Underestimate Runout Zones
Avalanche zones are divided into three parts: the start zone, the track and the runout zone.
The start zone is where the avalanche starts.
The track is the area covered by the moving avalanche.
The runout zone is the part of the path where the avalanche slows down, comes to rest and the debris is deposited. This might be a meadow or a low-angled area, but it could be less obvious, too.
When you read the avalanche bulletin, the forecasters are going to warn you about the big obvious avalanche paths, and give you a heads-up if the avalanche is running all the way full-track, meaning the full length of their path into the runout zone. Those areas are going to be easy to avoid because they’re huge, treeless swaths of forests knocked down, and they’re obvious to identify.
Less obvious paths can be short sections of steep terrain in the trees, the side of a glacial moraine, or any slope steep enough to slide. When in doubt, just avoid anything that gives you pause. A good avalanche course will help you begin to identify avalanche terrain from maps, guidebooks, images, and of course, in the field.
When skinning, you should take the extra time, whether it’s 30 minutes or an hour, and skin around these avalanche prone slopes, staying in a dense forest and skiing around the other side. Don’t bother estimating how far the avalanche is going to run, it involves guesswork and it’s probably not worth the risk.
Anytime you are crossing an obvious avalanche path, you don’t want to be hanging around — don’t stop, sit around or have your lunch. You need to ask yourself, “Is this a good idea or a bad idea?” Don’t cut corners. If you’re tired at the end of the day and just looking to get back to the car or hut, you still need to be disciplined, assess the risk and make smart choices.
How Dangerous is Backcountry Skiing?
Like any outdoor adventure sport, there are inherent risks with backcountry skiing. Hazards lurking in the form of shallow buried objects, avalanches, and on a glacier, potential crevasse falls, require vigilance and preparation, and are nothing to mess around with. If you fail to properly prepare for your trip, backcountry skiing can be extremely dangerous.
This is why, for your first couple seasons, just avoiding avalanche terrain altogether should be your goal. Utilize the knowledge of more experienced skiers, join backcountry ski forums, stay up-to-date on weather conditions, and when in doubt, consider skiing with a guide.
Guides do a lot more than just show you the best powder stashes and steep lines; their number one concern is keeping you safe.
Gradually ease into the backcountry your first year, avoid avy terrain, read the bulletin daily, find a mentor, and when in doubt — dial back your exposure to hazards. If you do that, you’ll have a great time. As you advance, consider upgrading your avalanche safety skills with AIARE Level 2. This advanced course will help you evaluate terrain risks and chart a path through it—moving from avoidance into navigation.